Live Streaming
Overview
Live video interactions can span across levels of interactivity; for instance, in a virtual event, some participants may be on stage conversing, while others are off stage listening.
At 100ms, we categorize live video interactions into three levels of interactivity. This enables you to construct live video use-cases by mixing and matching these levels to achieve your ideal solution.
-
On Stage (WebRTC): Full duplex audio/video in real-time
On stage participants can publish their audio/video and interact with others with sub-second latency, similar to real-time video conferencing platforms like Zoom or Google Meet -
Off Stage (WebRTC): Webinar-style audience with sub-second latency
Off stage participants consume audio/video from on stage participants with sub-second latency but do not publish their own audio/video. They can, however, engage with on stage participants through messaging, such as chat, emojis, and custom events, similar to a Zoom webinar.
-
Off Stage (HLS): Live stream audience consuming a delayed Stream (<10 s delay)
Delayed Stream participants consume a composite live stream, with less than 10 seconds of latency, without publishing their own audio/video, interacting with other participants via messaging. This experience is similar to platforms like Twitch or YouTube Live and is facilitated through 100ms Interactive Live Streaming
Live streaming uses HTTP Live Streaming (HLS) to achieve near real-time latency at scale.
The roles primitive allows defining participant capabilities and associating them with an interaction level, enabling participants to move between levels with a single API call to change roles.
Get Started with Prebuilt (No-code)
Build your Live Streaming use-case using Prebuilt and our Customiser to build your use-case without writing a single line of code.
Get Started
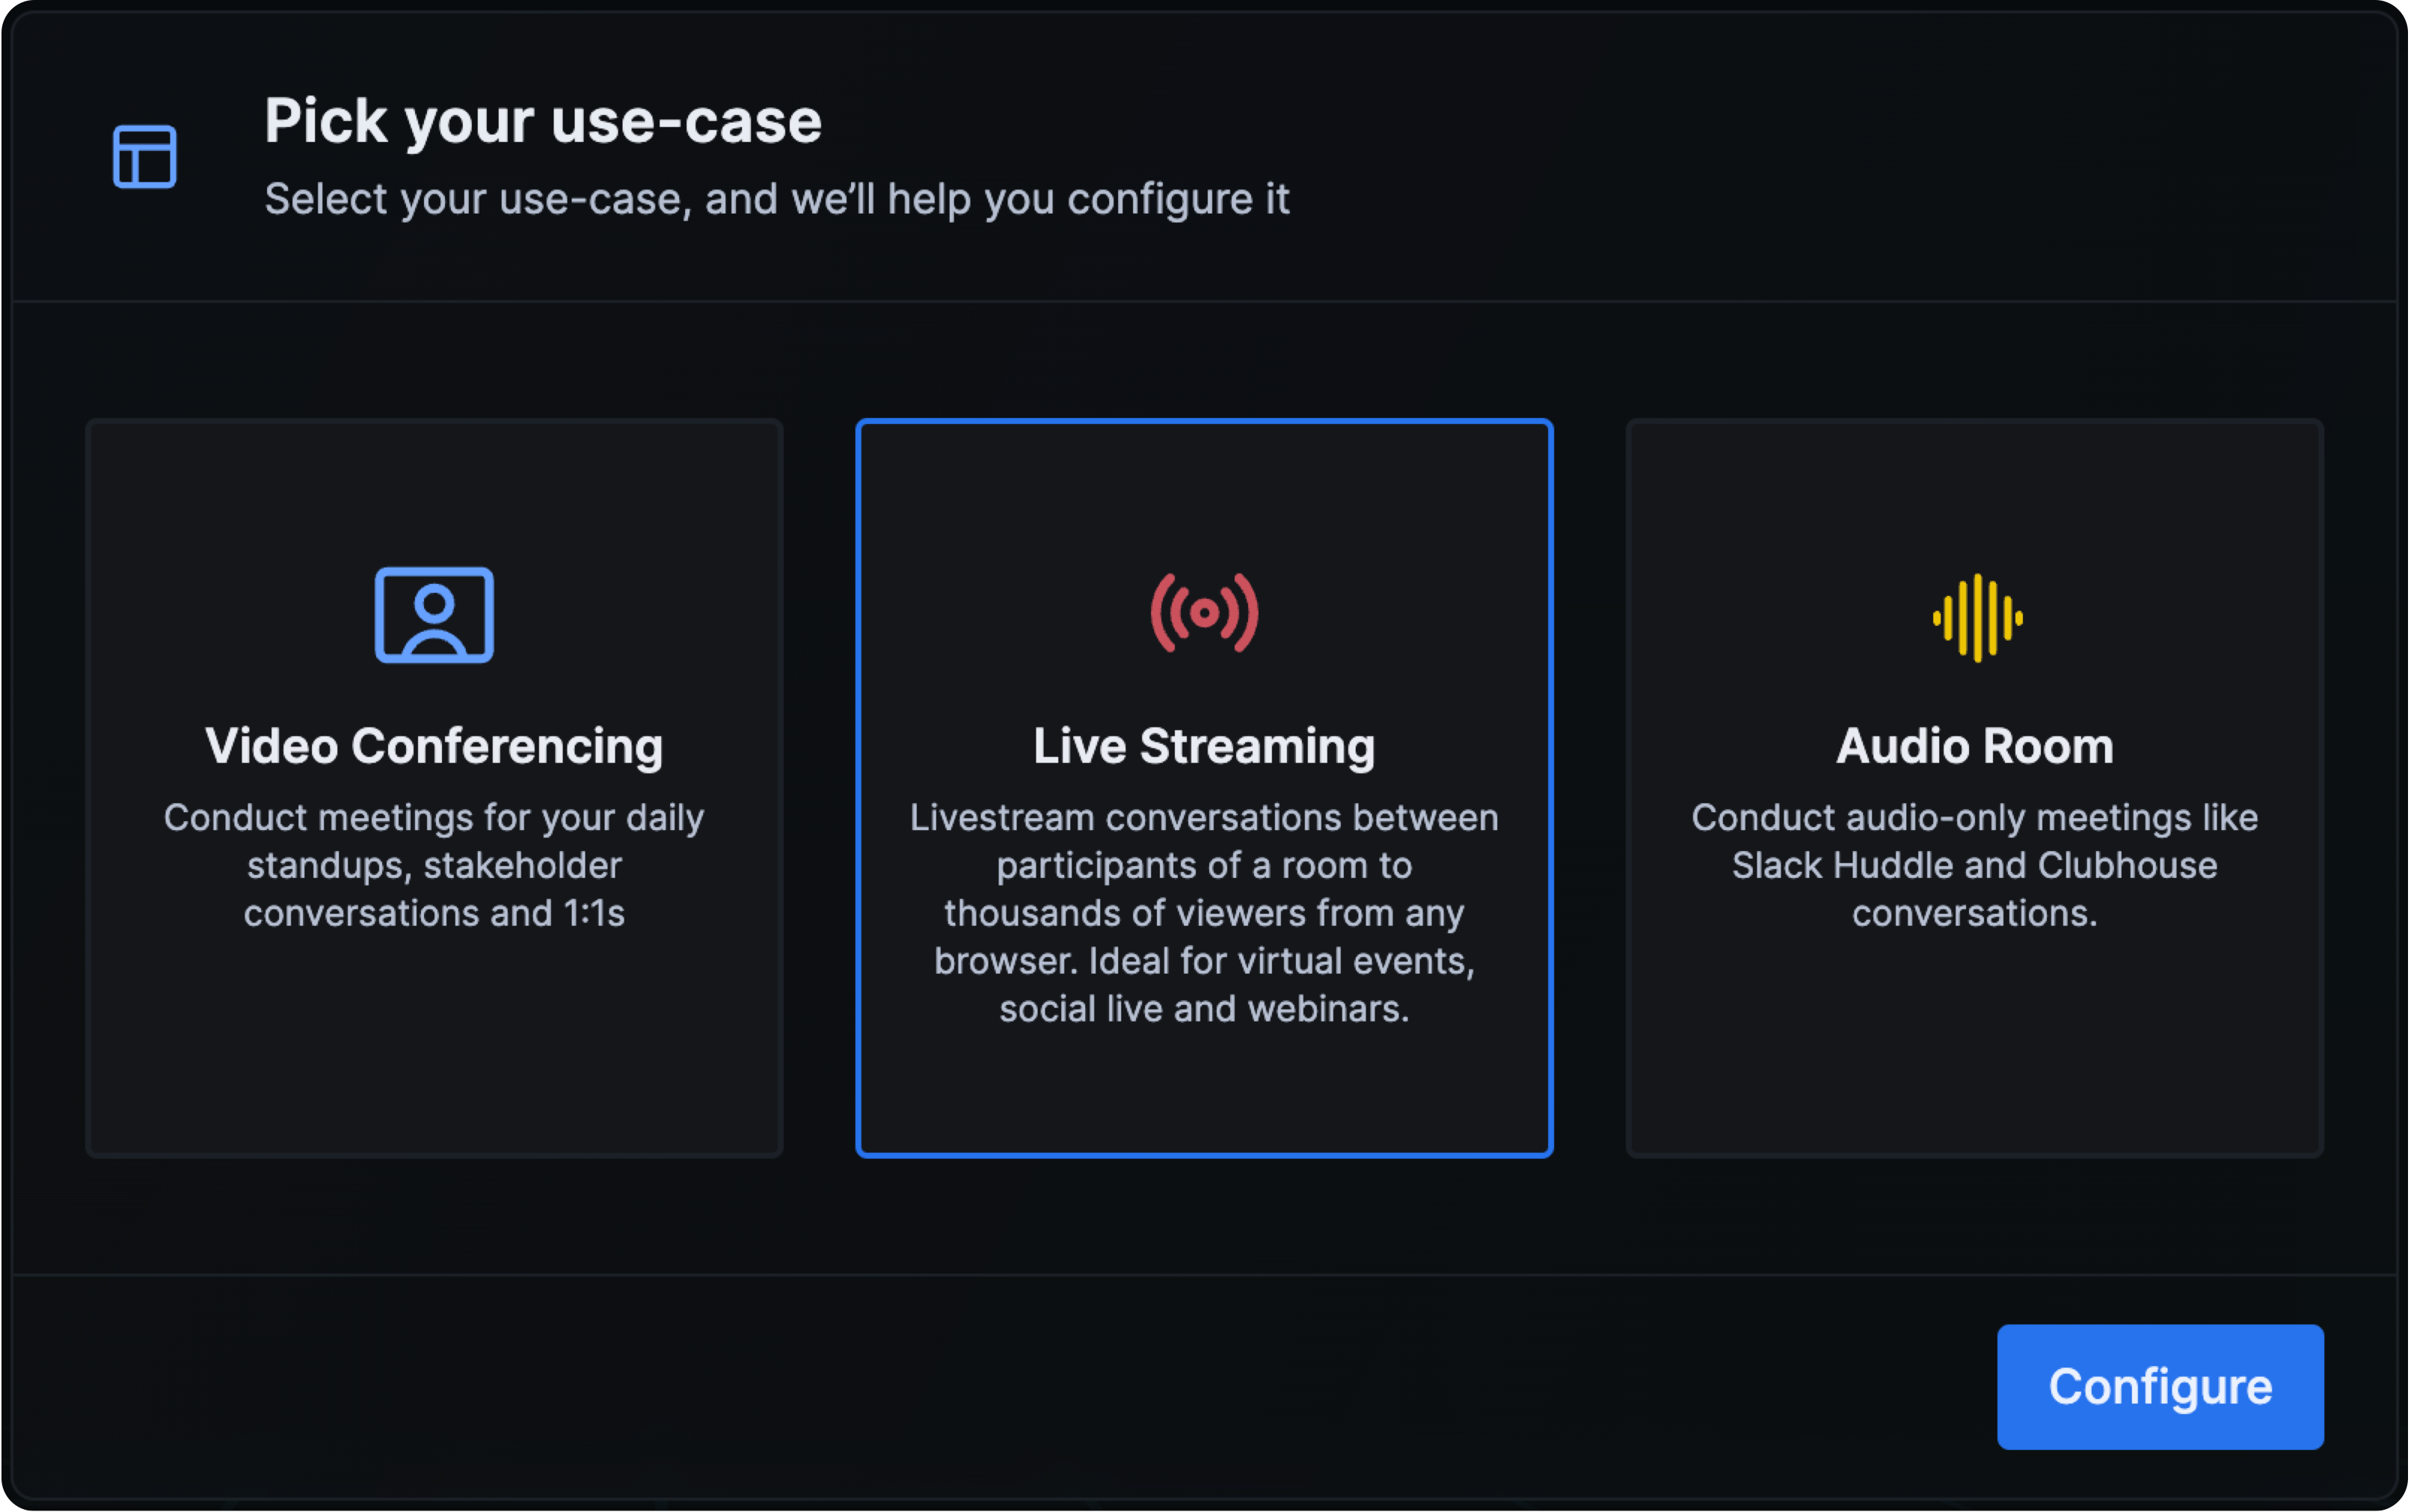
- Make sure that you have an account with 100ms, then go to 100ms dashboard
- If you have previously signed up, click on Create Template on the dashboard
- Select the Live Streaming use-case and proceed to configure
Configure
- Choose where the broadcaster will stream from. This will ensure the end user experience is optimised based on the broadcaster's video aspect ratio
- Choose if viewers can be invited to join the stage. This will enable the broadcaster and co-broadcaster to temporarily invite viewers on stage, and remove them later
- Choose if you want to record the stream. Recording will automatically start when the broadcaster goes live. To start with, we will store your recordings for 15 days. You can add your own storage later.
- Finally, choose what type of recording you require. Video on Demand (.m3u8) is optimised for re-streaming content later, while .mp4 is optimised for Post-processing (such as editing the video)
- If you are not sure, you can always change this configuration later
Understand Roles
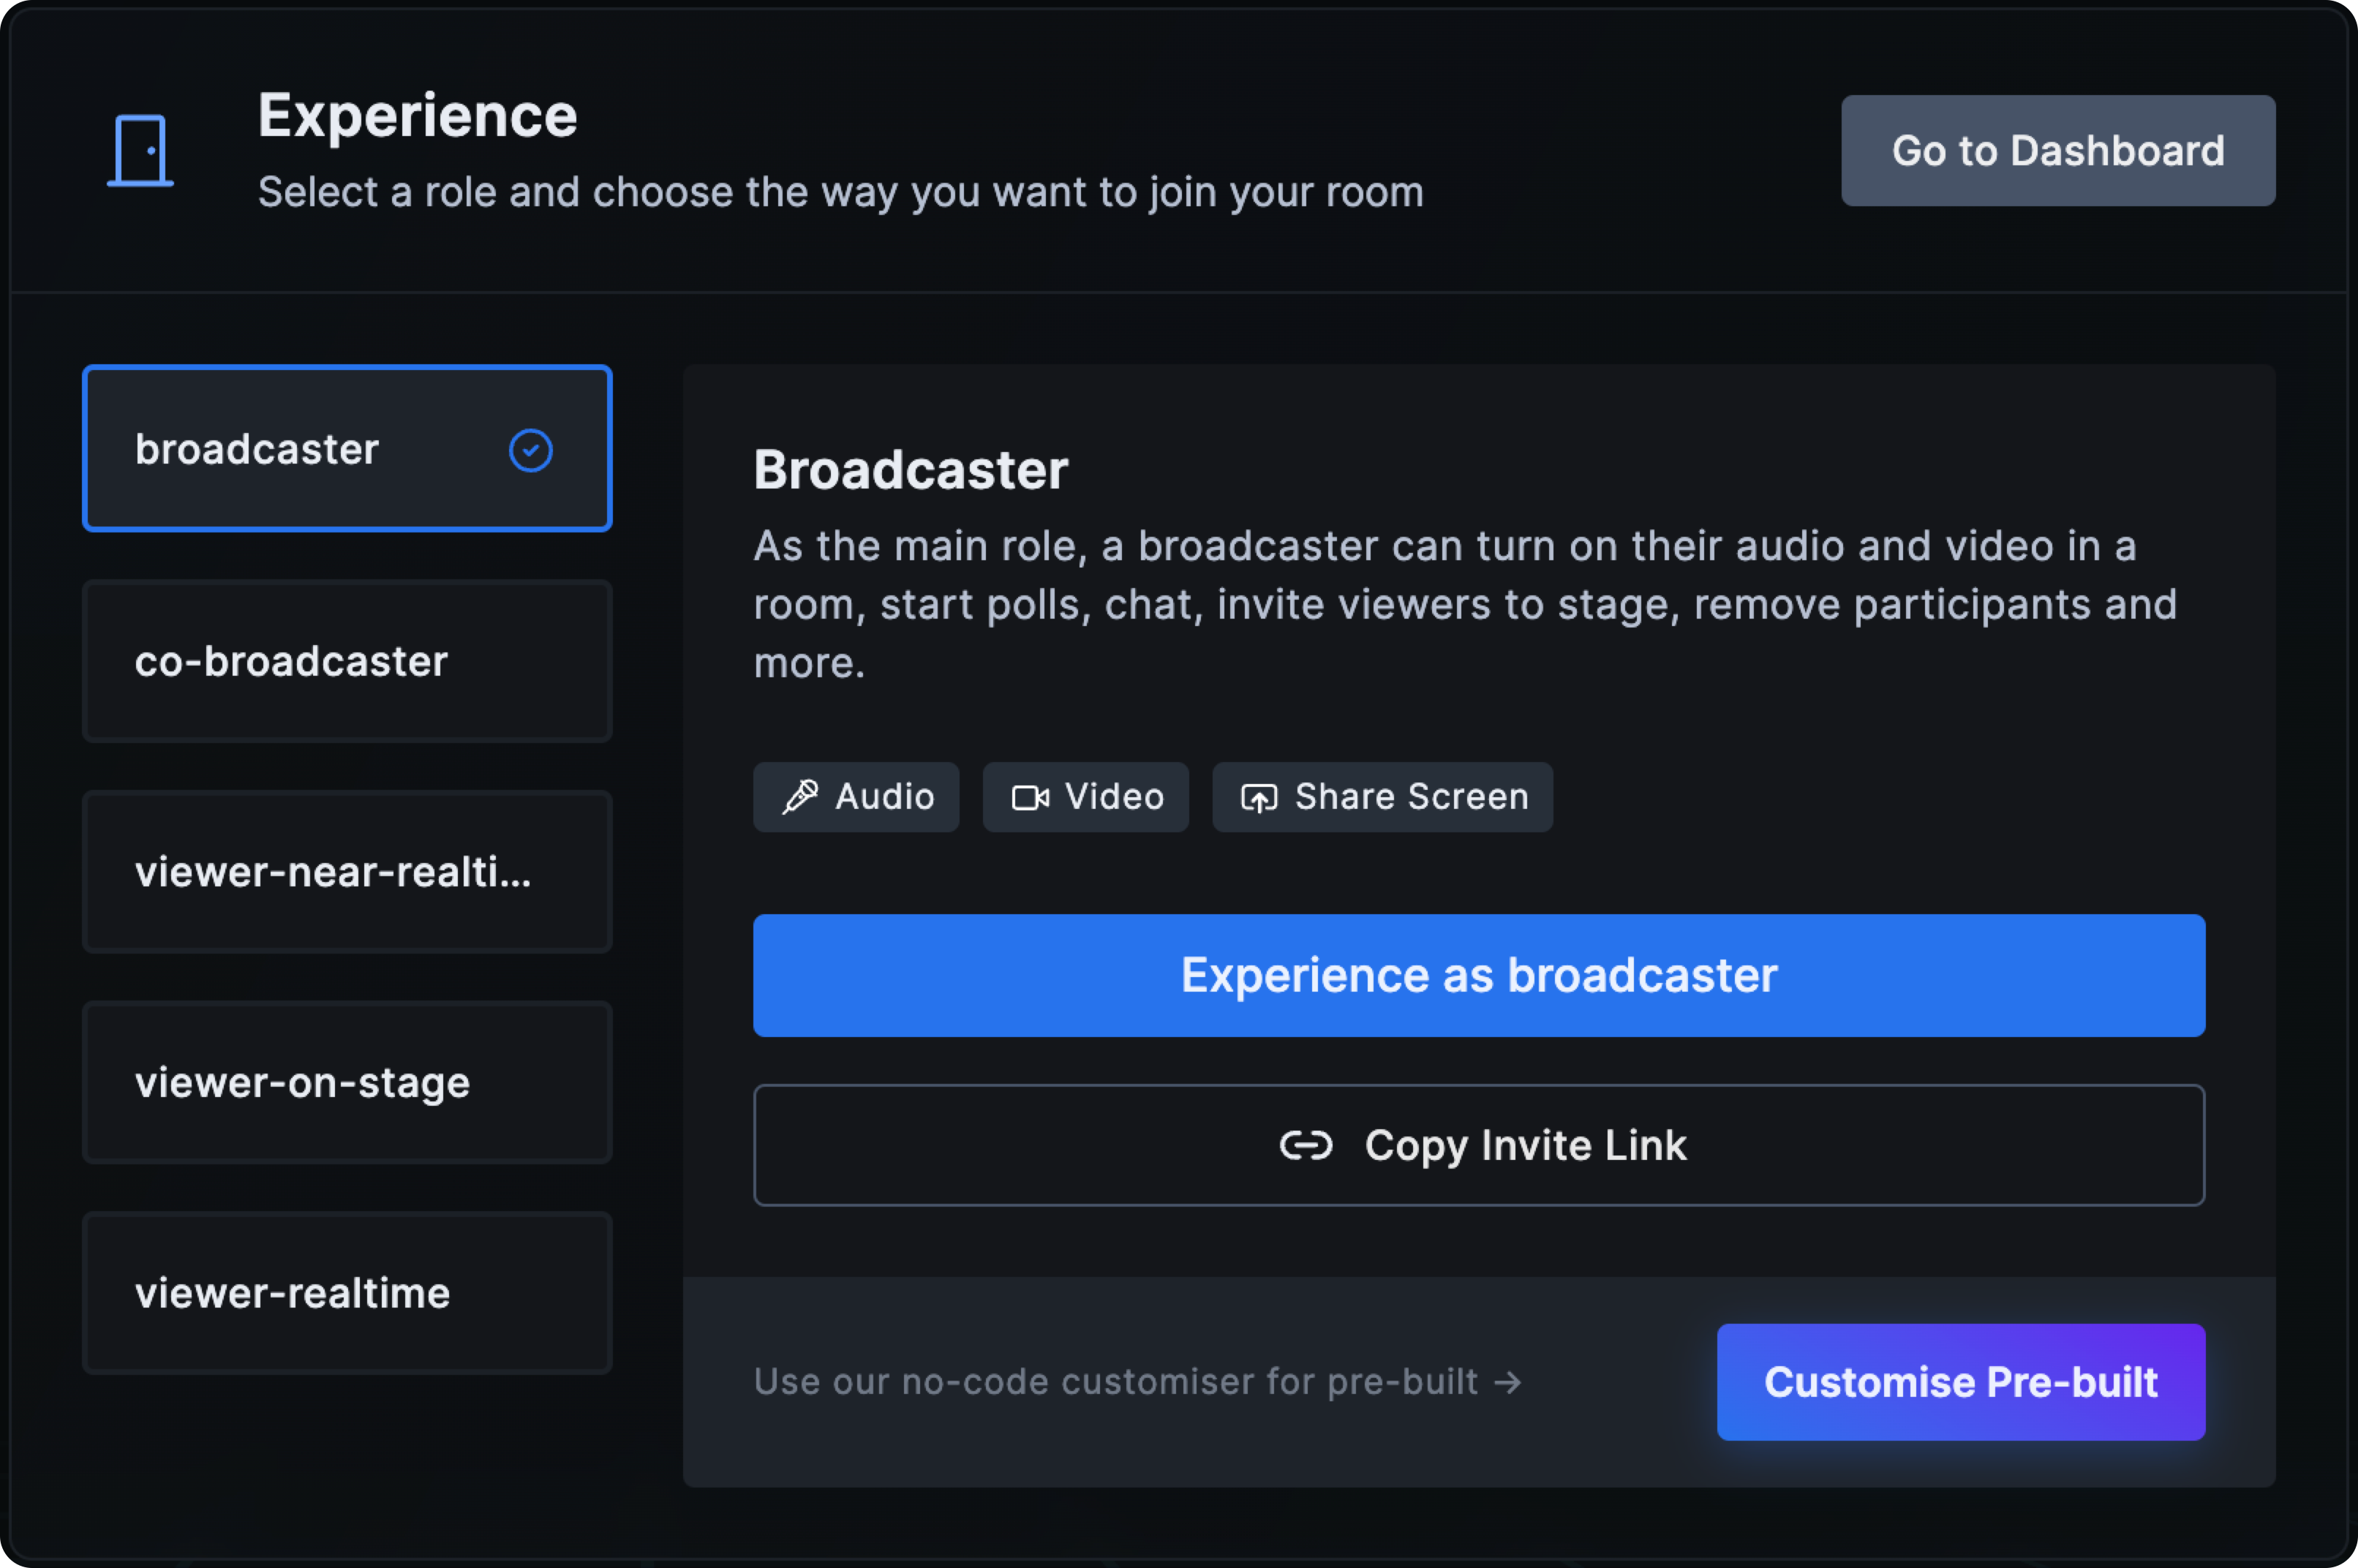
This configures your new template with roles and prebuilt that can be customised (more on this later). All rooms created based on this template will have this configuration.
broadcaster: This role represents a streamer on stage, capable of publishing their audio/video. There can be multiple participants who join as a broadcasterco-broadcaster: This role represents a streamer on stage, who can also publish their audio/video but cannot start or stop the stream, providing a level of control over the broadcast flowviewer-realtime: This role represents an off stage participant (WebRTC), who subscribes to on stage participants and can interact using messaging, but cannot publish audio/videoviewer-near-realtime: This role represents an off stage participant (HLS) with a delayed stream, who subscribes to the composite live stream and can interact using messagingviewer-on-stage(only if enabled): This role represents a temporary on stage participant (WebRTC), who subscribes to the broadcaster and co-broadcaster, and can share audio/video
Experience Live Streaming
- Click on Experience as
broadcaster - Enter your name and click on Go Live to start the live stream
- Once the stream has started, join the room from another tab/device as a
viewer-delayed-streamand you should be able to see the ongoing live stream - Use chat messages to interact between the viewer and the broadcaster
Integrate in your app
To integrate 100ms Interactive Live Streaming in your app, follow these steps:
- Enable live streaming
- Integrate the 100ms SDK in your app
- Integrate live stream playback
- Video on demand (VOD) use-cases
Enable live streaming
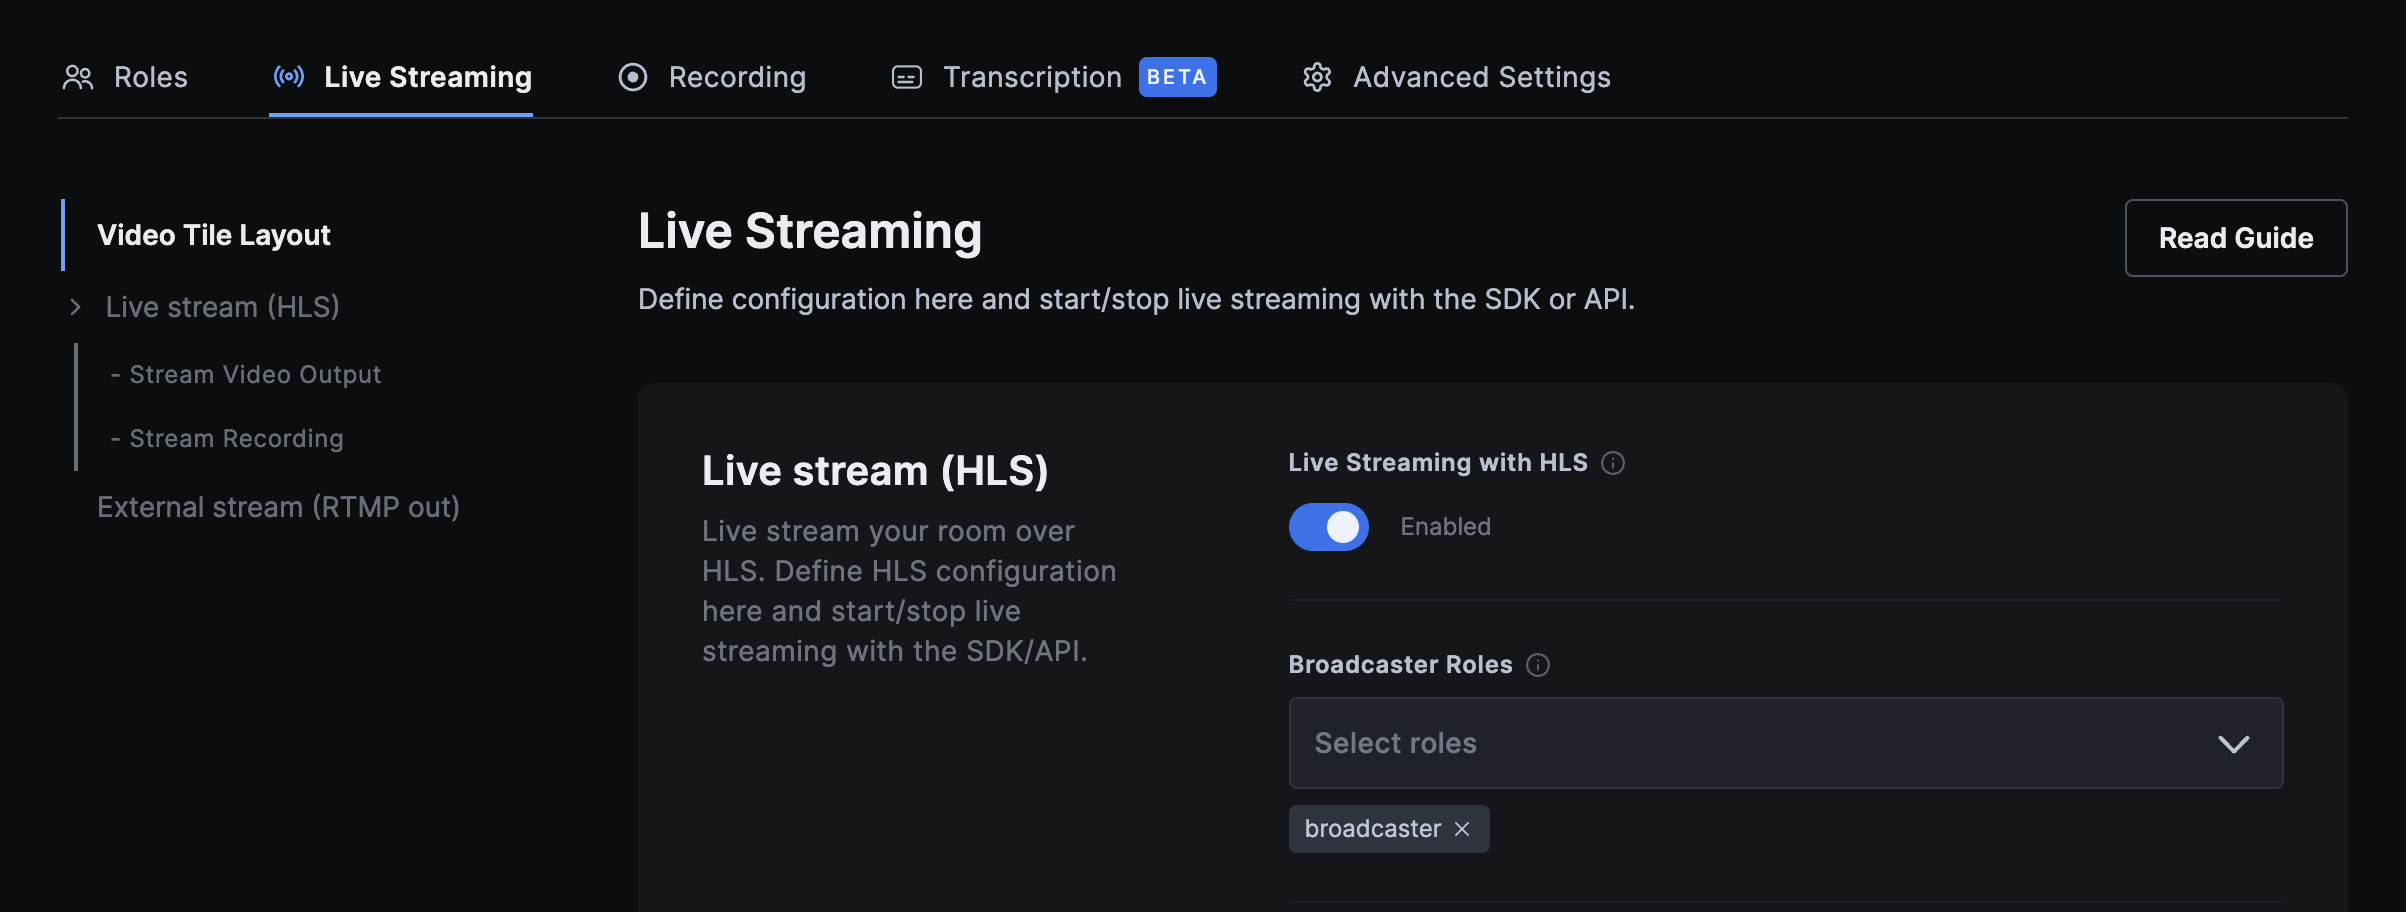
If your app is based on the Live Streaming Starter Kit (as shown above), the live streaming destination is enabled out-of-the-box.
For custom apps, you can enable the live streaming destination manually:
- Open configuration for your existing app using the 100ms dashboard
- In the "destinations" tab, enable "Live Streaming with HLS"
- Ensure that you have roles for the broadcaster (who can publish their audio/video) and the viewer (who cannot publish audio/video)
SDK integration
Use the 100ms client-side SDKs to integrate streaming in your application. See code snippets for the client-side SDK here.
Live stream playback
Using our client-side SDKs, you can enable live stream playback and add interactive experiences like chat, raise hand and other functionalities to your app using peer metadata.
The process is so simple:
- Once you start live streaming, you will get an HLS URL (M3U8 URL) which you can use for playback.
- You can use the client-side SDK to get the HLS URL by checking the current state of the room and start playback.
If you need to only enable HLS playback and don't need interactivity, you can follow one of the below approaches to get the HLS URL:
-
Webhook: You can listen to
hls.started.successwebhook event and get the HLS URL from theurlfield. Please check the webhooks guide to learn more about webhooks. -
Static URL: This configuration will help you get a static URL for playback. You can enable the
Static playback URLsin your template from the dashboard. You can go to Destination > enable "Live streaming with HLS" > under "Stream Video Output" section > enable "Static Playback URLs"- Format:
https://cdn.100ms.live/beam/<customer_id>/<room_id>/master.m3u8 customer_id: replace this placeholder with your customer_id from developer section on your dashboard.room_id: replace this placeholder with theroom_idof the respective room from which the stream will be broadcasted.
- Format:
Video on Demand (VOD) use-cases
If you wish to replay your HLS stream for Video on demand (VOD) use-case, 100ms provides the capability to record the HLS stream which will be posted to your webhook as a ZIP file of M3U8 format (same playback format as HLS) with all the chunks once the stream ends.
You can start recording a live stream using the client-side SDK or using the server API. Once the HLS recording is completed, you will get the details of recording as a callback to the webhook configured in your account. Check hls.recording.success webhook event for more information.