Home
/ Blog /
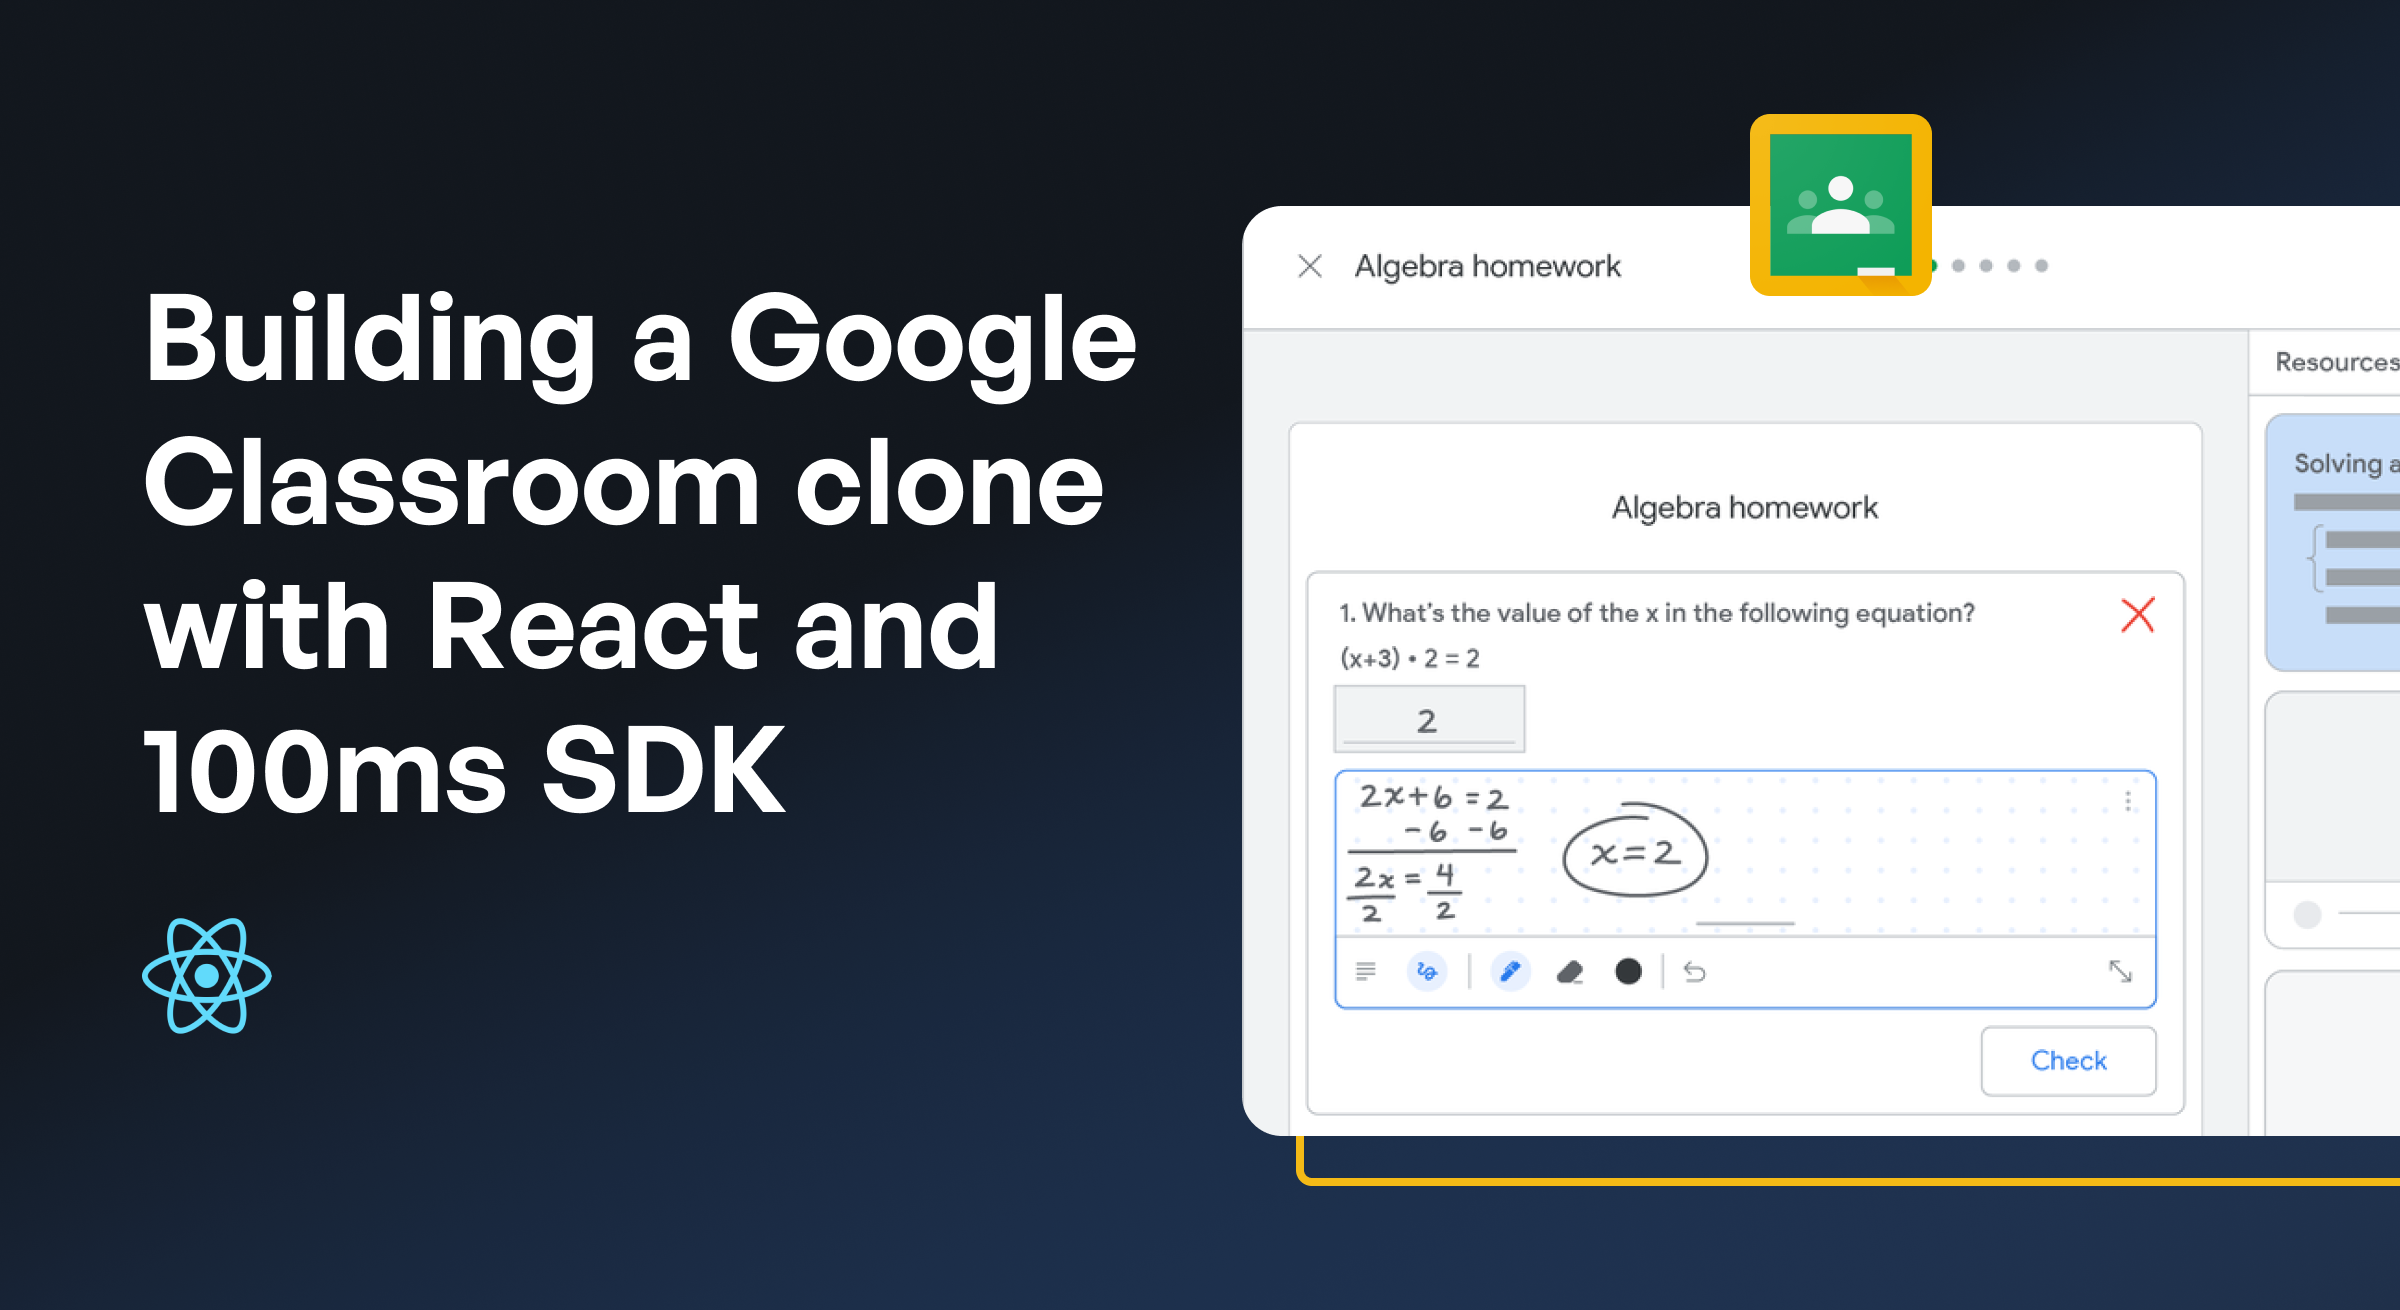
Building a Google classroom clone with React and 100ms SDKBuilding a Google classroom clone with React and 100ms SDK
May 9, 202217 min read


Share


In the past few years, due to the pandemic, most educational institutions like schools and colleges are had to switch towards a completely online teaching experience. Many services on the internet assist teachers with this, one of the most popular being Google Classroom.
This article will discuss how to create a Google Classroom clone with React and the 100ms SDK. But first, the obvious question:
Why 100ms?
100ms is a cloud-based platform that lets you integrate video and audio conferencing into your application. It provides APIs and SDKs through which you can set up and manage telecommunication services on the client and server-side applications.
It provides a dashboard that makes it quite easy to manipulate descriptive features of a video/audio platform from in-app interaction to session recording. The 100ms SDK and packages are easy-to-use tools that save time without compromising effectiveness.
Important Terms
Before diving into the tutorial, here are a few terms you should be familiar with:
-
Room: A room is a basic object that 100ms SDKs return on successful connection. This contains references to peers, tracks, and everything you need to render a live audio/video app.
-
Role: A role defines who a peer can see/hear, the quality at which they publish their video, whether they have permission to publish video/screen share, mute someone, change someone's role, or more in a call.
-
Track: A track represents either the audio or video that a peer is publishing.
-
Peer: A peer is an object returned by 100ms SDKs that contains all information about a user - name, role, video track, etc.
This tutorial will cover the following:
- Creating a classroom where peers can join and wait.
- Creating a dashboard to view all classes a peer has, along with chat and screen share options.
- Muting and unmuting the audio and video for both local and remote peers.
- Creating a hand raise option for both local and remote peers.
- Creating a whiteboard feature where lectures can be written.
Prerequisites
-
A 100ms.live account, to get the APP_ACCESS_KEY and APP_SECRET from the developer section in the dashboard.
-
Basic knowledge of JavaScript, React, and Websocket
-
JavaScript, React, Nodejs, Git Version Control, VScode, or any code editor of your choice.
Project Setup
-
Create a React App: Use npm for boilerplate create react app.
-
Link 100ms SDK to the app: Install the 100ms react SDK and project dependencies.
-
Retrieve Credentials: Get token_endpoint, room_id, APP_ACCESS_KEY, and APP_SECRET from the developer section of the dashboard.
-
Create Roles: Create the viewer and stage roles and determine the permission for peers - audio, video, mute, unmute, share screen, etc.
-
Create Room: Users that join the class have automatically joined a room and are referred to as peers.
-
Develop Collaborative Whiteboard: Use a Websocket, React, and NodeJS.
-
Build Clone: Use
hmsActionandhmsStorehooks to start building our clone. Fill in token_endpoint and room_id.
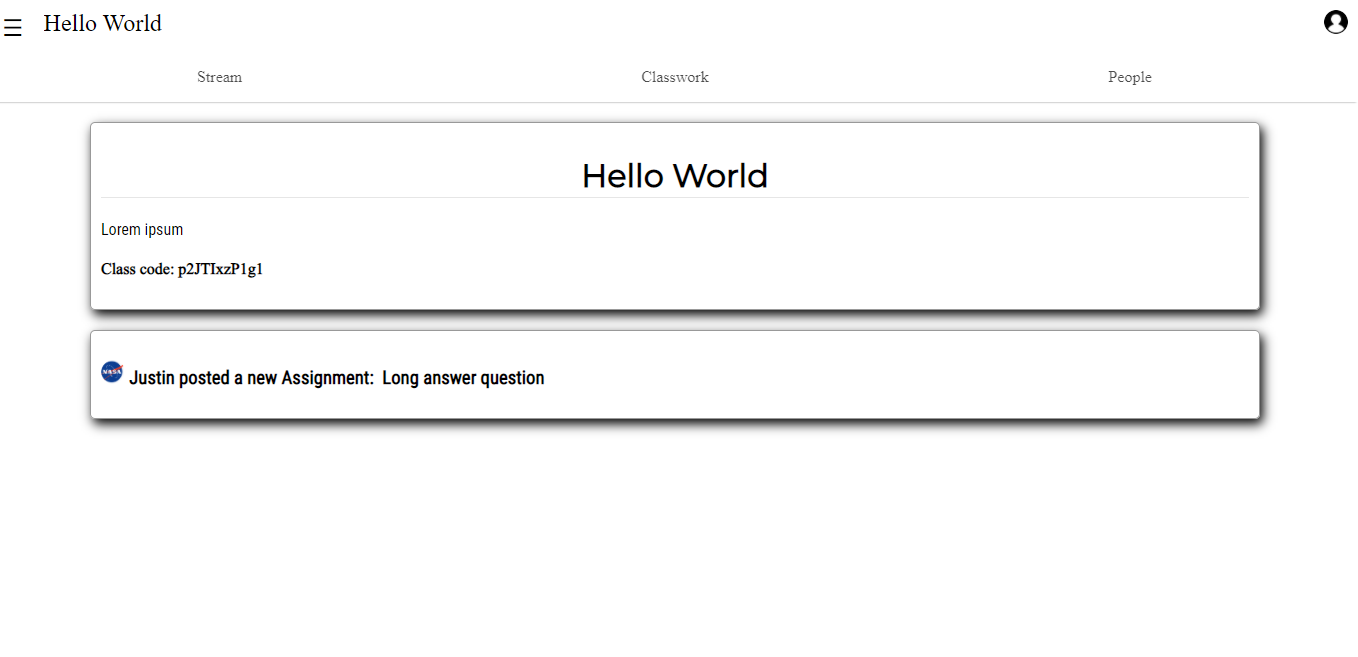
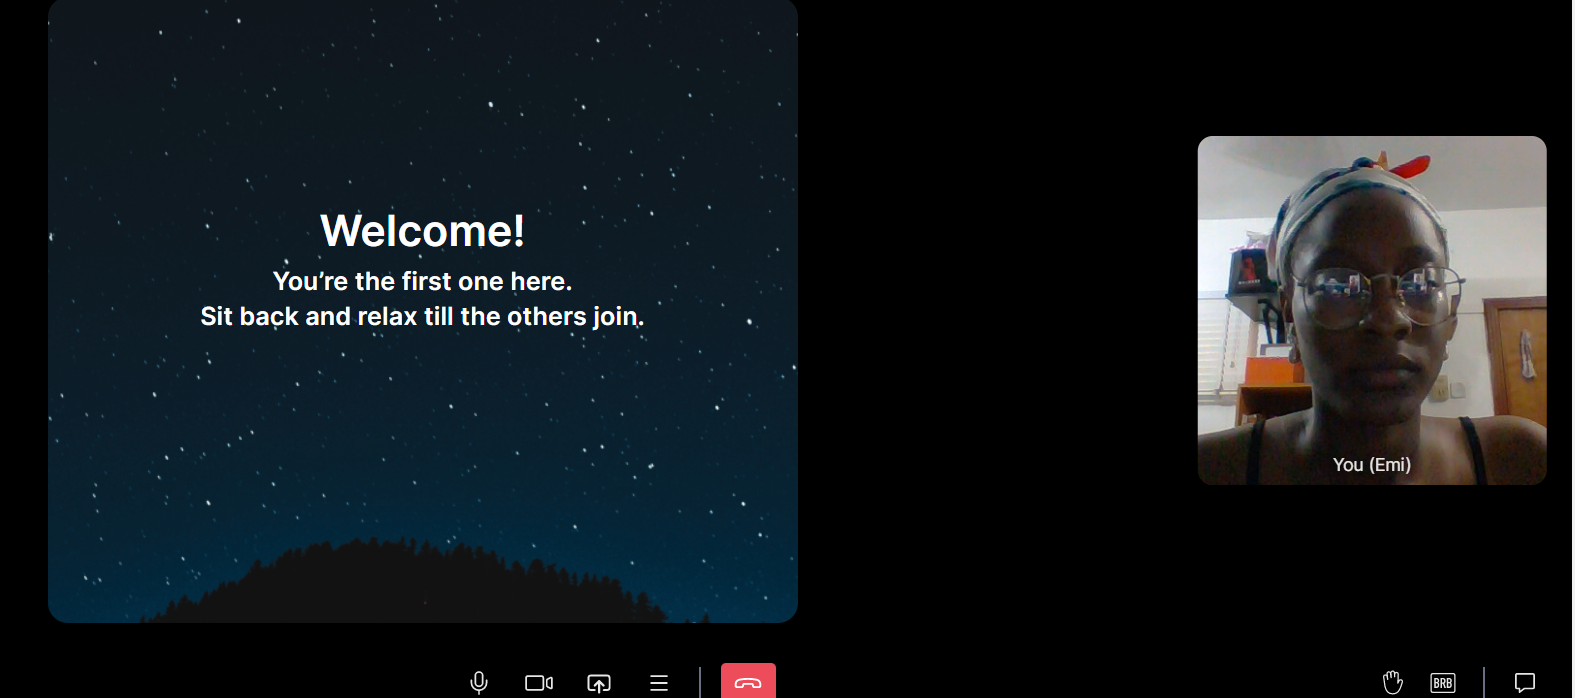
At the end of this tutorial, your Google classroom clone should look like this:
Setting Up The Project
Before getting into the code, create a 100ms account from the 100ms dashboard to get your token_endpoint and room_id. We will need these credentials while building the application.
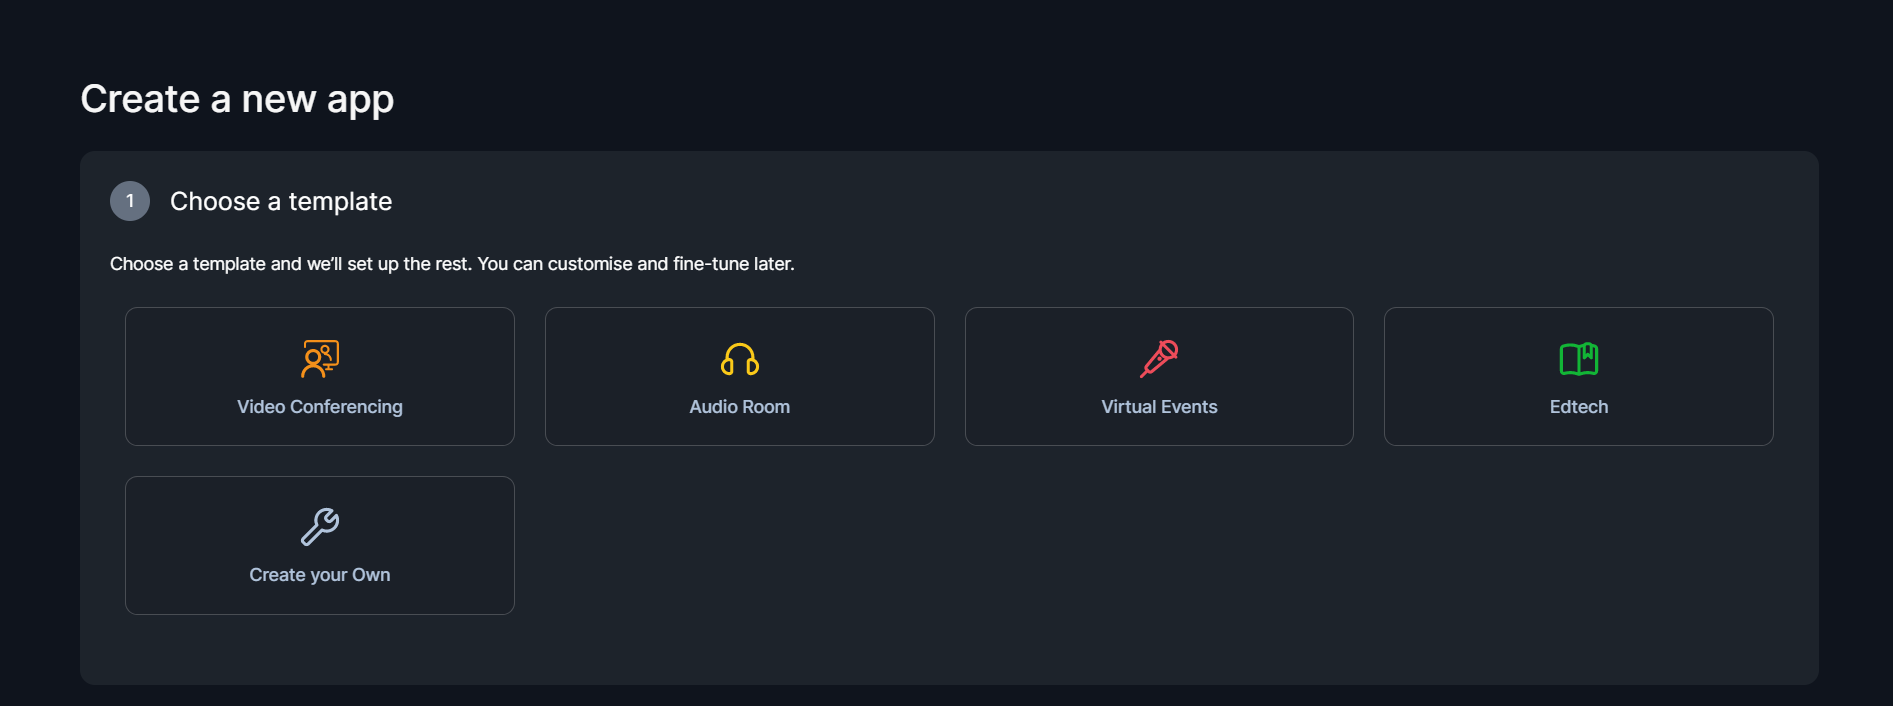
Once the account has been created, follow the steps below to create your application and set it up on a 100ms dashboard.
- To create a new app on the dashboard, you have to choose a template. Since our Google classroom is an Edtech app, we select Edtech.
Defining Roles
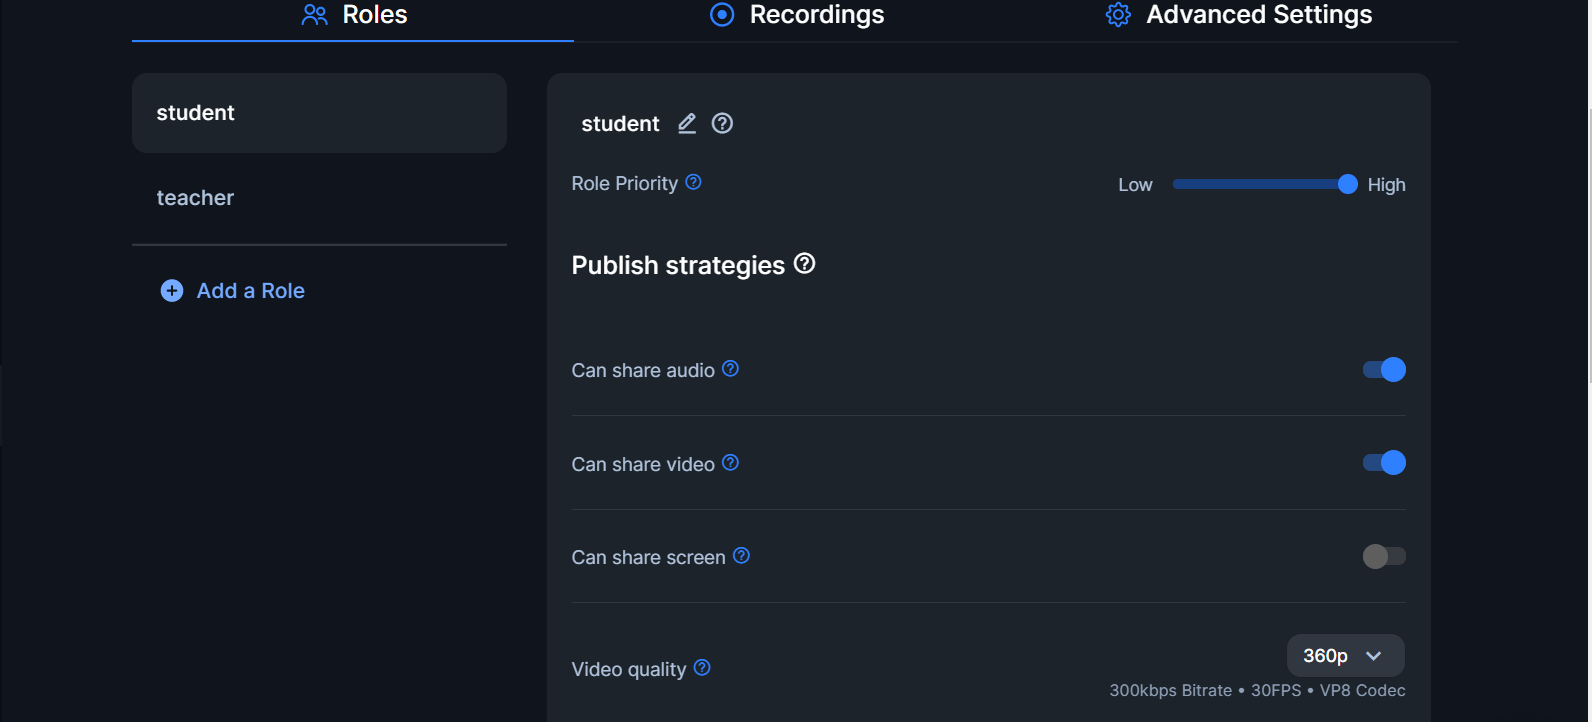
After creating our app, we have to create two roles: student and teacher. Then we set up permissions for each role.
For the student role, we can turn on some publishing strategies like the video and audio but turn off the screen share option as we don’t want students to have that option. Students will be able to switch on their video and audio so that they can be seen and can speak.
- For the teacher role, all publish strategies will be on as the teacher will have to be seen, heard, and be able to share their screen.
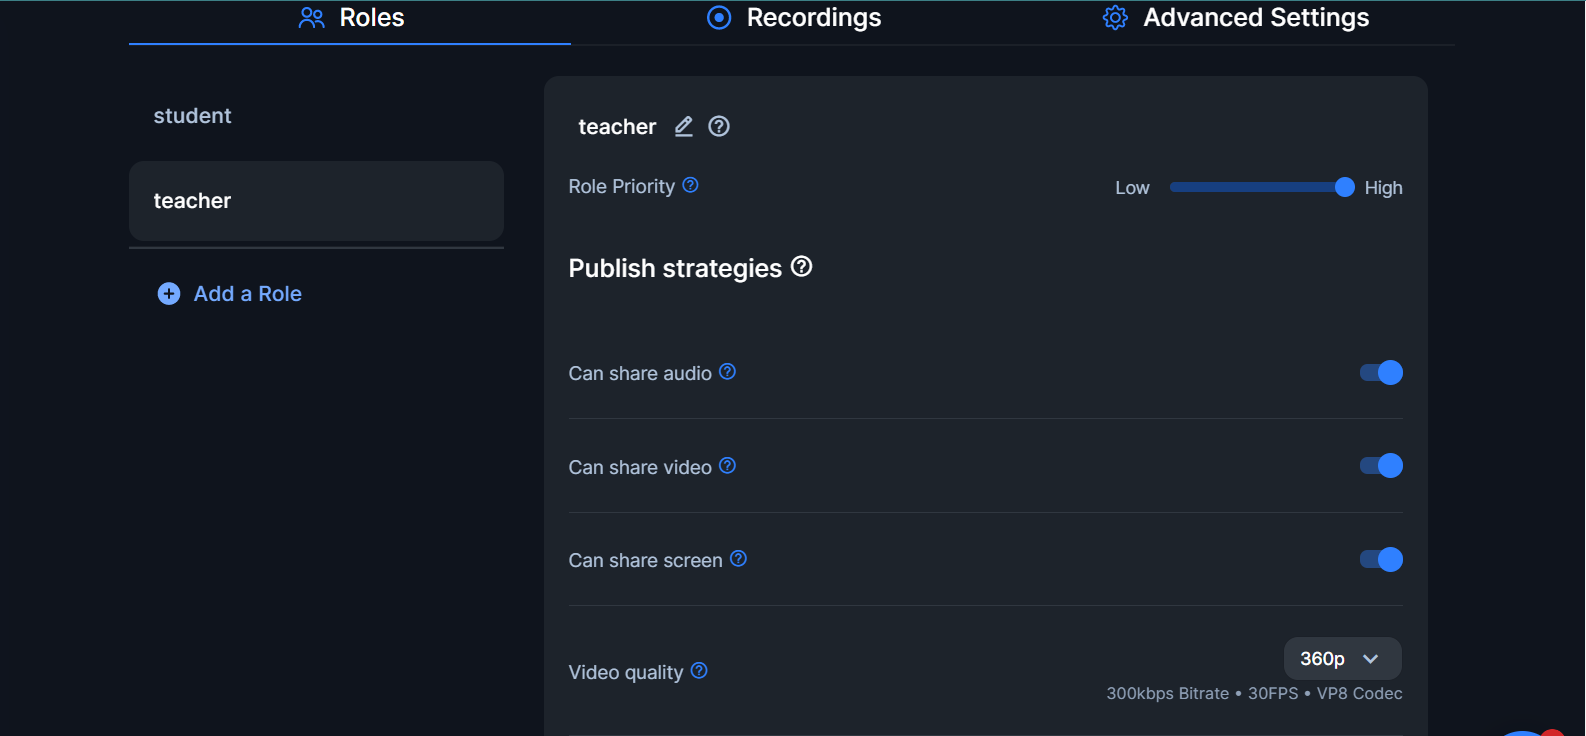
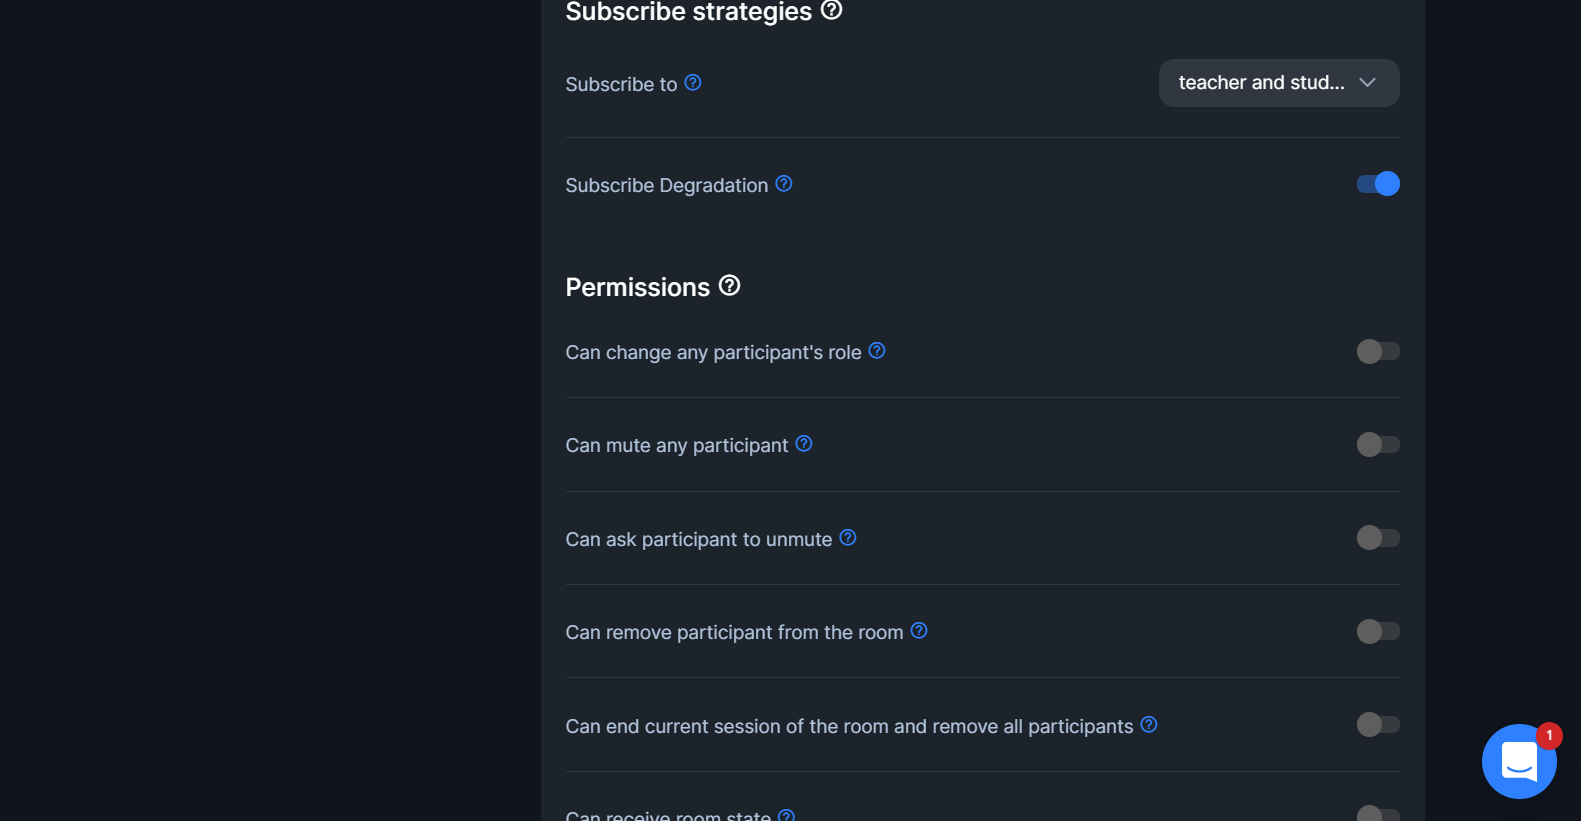
- The subscribe strategies and permissions for students should be turned off as we don’t want the students to mute anyone, change a participant’s role or remove any participant. But subscribe strategies for the teacher should be enabled.
And with that, we’re ready to move on and acquire the required credentials from the 100ms Dashboard.
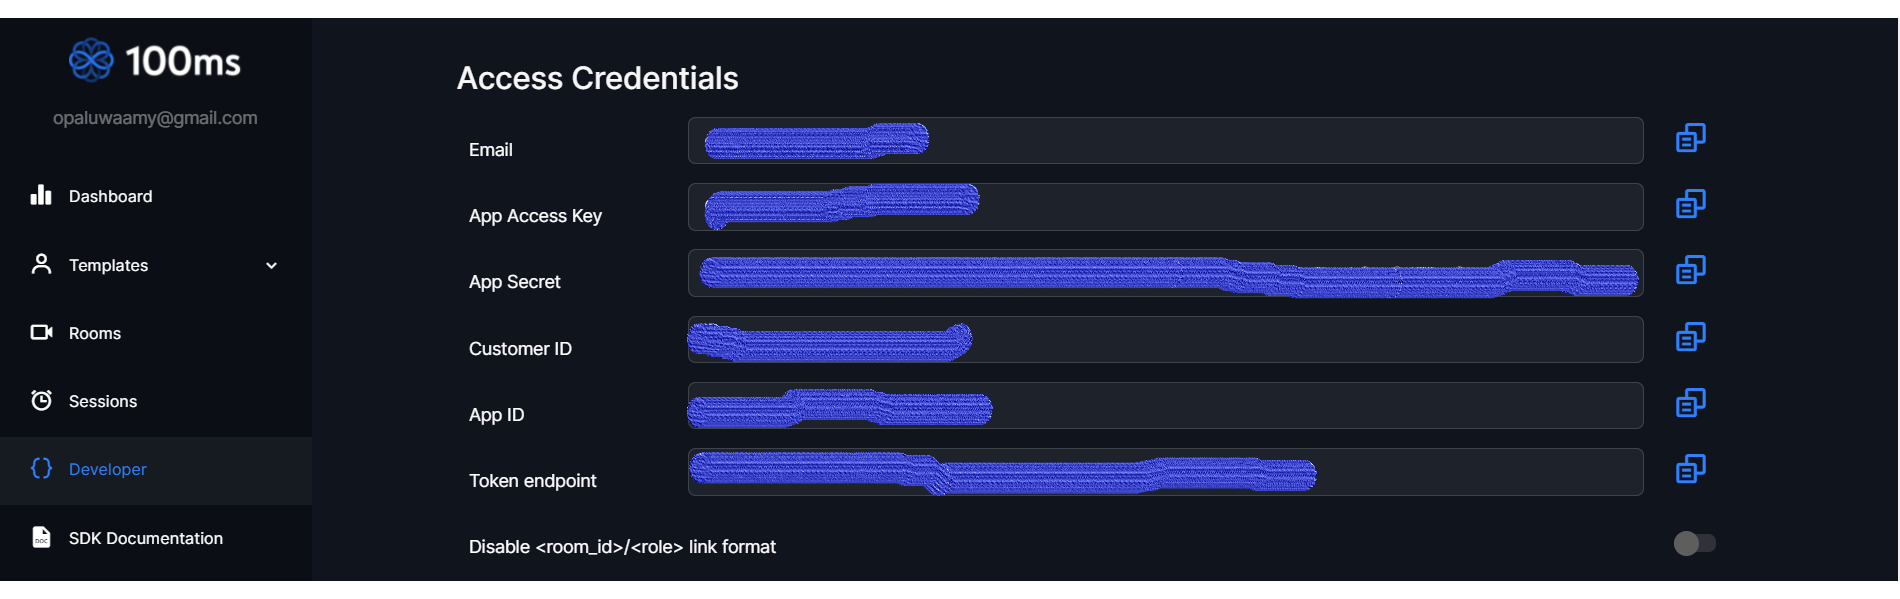
Getting the token_endpoint
Once you’re done creating your custom application and setting up the roles, head on over to the Developers tab to get your token endpoint URL. Keep this URL handy as it is very important. We’ll be using it shortly.
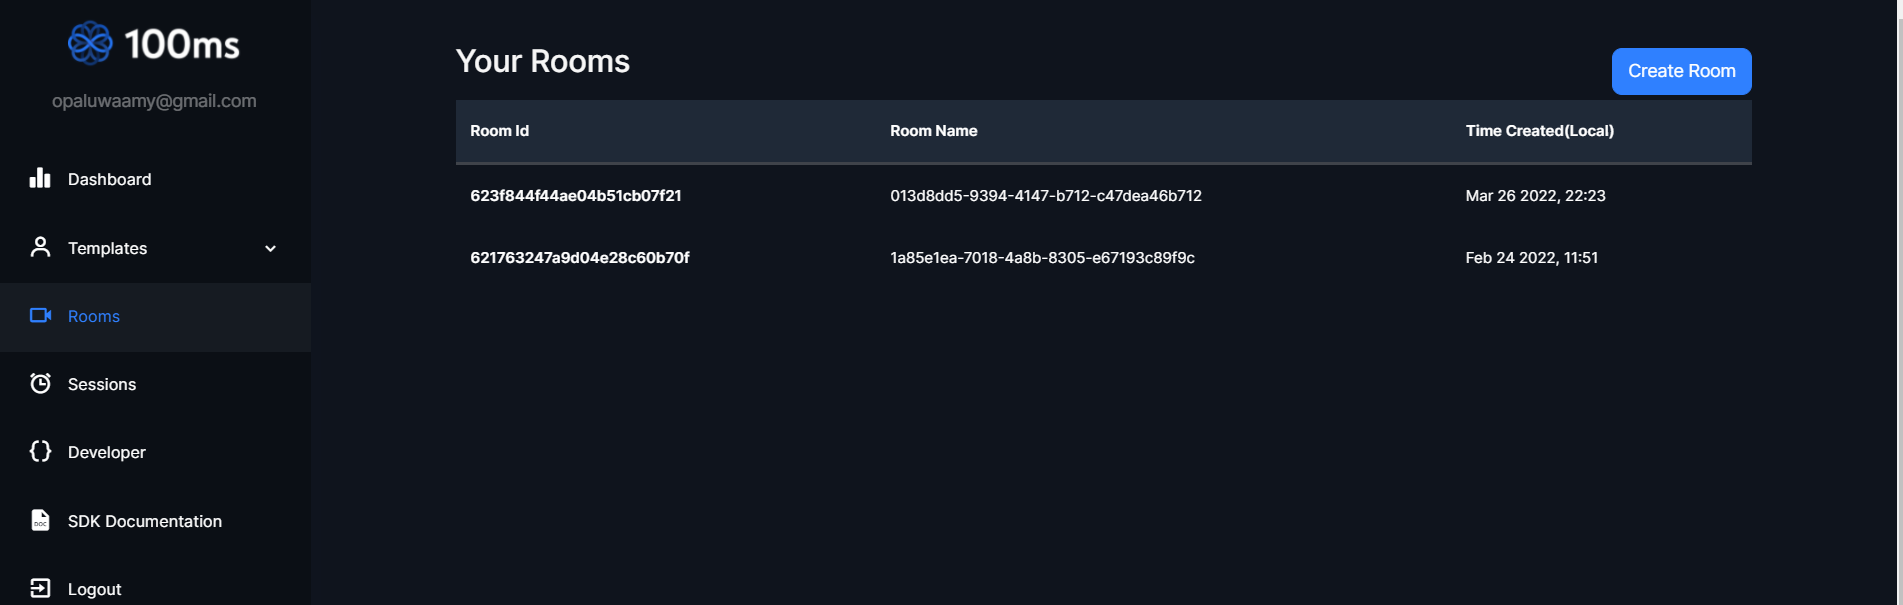
Getting the room_id
To obtain the room ID, head to the Rooms tab on the Dashboard. You’ll see an existing room. Copy the room ID and keep it somewhere safe.
Starter Project
Here’s a starter project based on the create-react-app folder that includes utils, styles, assets, and components for utilities like the whiteboard feature, token call, styles, images, and js files respectively.
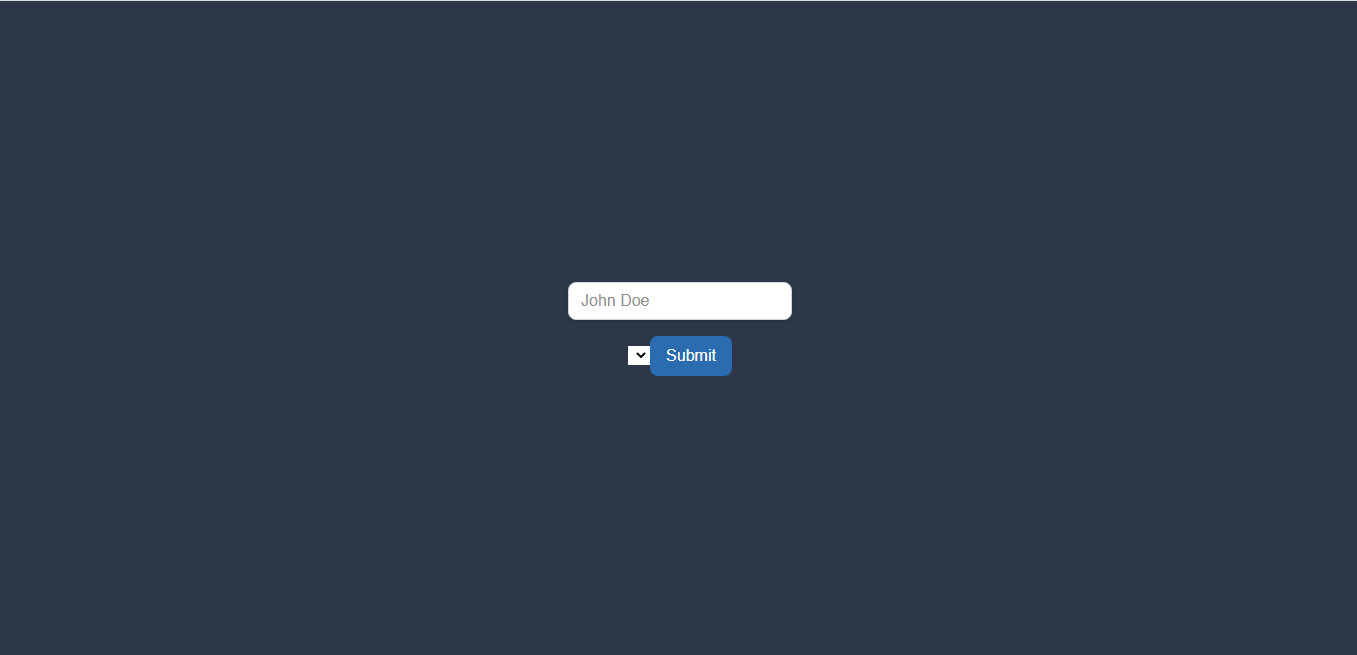
You will also find some imports and hooks already built to make the starter project easy to use. Just follow the steps and you should get a working app. Clone or download the repository and run npm install in your IDE terminal to install all dependencies. Run npm start to start the server in your localhost.
This is what you’ll get in your localhost:
Building the clone
To use the 100ms SDK that we installed previously, we need to be familiar with two hooks:
-
hmsActions: This is used to perform any action such as sending a message or joining a room.
-
hmsStore: This contains the complete state of the room at any given time such as the participant details etc.
- Let’s start with the getToken.js file in the utils folder:
const endPoint ="https://prod-in.100ms.live/hmsapi/googleclassroomclone.app.100ms.live/";

export default async function getToken(role) {
  // Fix in endPoint and roomId
    const response = await fetch(`${endPoint}api/token`, {
      method: 'POST',
      body: JSON.stringify({
        user_id: '54321', // User ID assigned by you (different from 100ms' assigned id)
        role: role, // listener , speaker , moderator
        room_id: "621763b758e91474bc186b69"
      }),
    });

    const { token } = await response.json();

    return token;
  }
-
Fill in your token_endpoint and room_id, as is shown above.
-
To call the join function, add the following code to your
joinRoomfunction in the JoinForm.js file. This is necessary because when a user joins a room, we want to display the room the user joined -whether as a host(teacher) or a viewer(student).
const joinRoom = () => {
    getToken(role).then((token) => {
      hmsActions.join({
        userName: userName || 'Anonymous',
        authToken: token,
        settings: {
          isAudioMuted: true,
        },
      });
    }).catch((error) => {
      console.log('Token API Error', error);
    });

  };
-
We will be displaying different features from the app, depending on the role of the user who joined the room. For the teacher, we’ll display a mirror video, a class section, and a whiteboard feature. For the student, we’ll be displaying the teacher’s video, screen share functions, chat section, and leave button.
-
In the Room.js file, our
localPeerwill be known as class.
import React from "react";
import Screen from "../Video/Screen";
import VideoTile from "../Video/VideoTile";
import ControlBar from "../Control/ControlBar";
import ChatContainer from '../Chat/ChatContainer';
import Footer from "../Control/Footer";
import Header from "../Control/Header";
import {
  useHMSStore,
  selectLocalPeer,
  selectPeers
} from "@100mslive/hms-video-react";

const Room = () => {
  const localPeer = useHMSStore(selectLocalPeer);
  const isModerator = localPeer.roleName === "class";
  const peers = useHMSStore(selectPeers);
- To add toggle functions to controlbar.js, add this to the code:
const ControlBar = () => {
  const peers = useHMSStore(selectPeers);
  const hmsActions = useHMSActions();
  const localPeer = useHMSStore(selectLocalPeer);
  const isModerator = localPeer.roleName === "class";
  const isLocalAudioEnabled = useHMSStore(selectIsLocalAudioEnabled);
  const isLocalVideoEnabled = useHMSStore(selectIsLocalVideoEnabled);
  const isLocalScreenShared = useHMSStore(selectIsLocalScreenShared);

  // Toggle options

  const toggleAudio = async () => {
    await hmsActions.setLocalAudioEnabled(!isLocalAudioEnabled);
  };
  const toggleVideo = async () => {
    await hmsActions.setLocalVideoEnabled(!isLocalVideoEnabled);
  };

  const toggleScreen = async () => {
    await hmsActions.setScreenShareEnabled(!isLocalScreenShared);
  }
- For the audio controls, add the following:
isLocalAudioEnabled ? (
    <img src={Unmute} alt="mute" className="image h-5 w-5 rounded-lg" />
  ) : (
    <img src={Mute} alt="unmute" className="image h-5 w-5 bg-gray-900 rounded-lg" />
  )};

<button
  className="tracking-wider outline-none mr-2"
  onClick={toggleAudio}
  active={isLocalAudioEnabled}
>
  {<button
  className="text-xs uppercase tracking-wider bg-white py-1 px-2 rounded-lg shadow-lg text-iwhite ml-2 bg-red-600"
  onClick={() => {
      hmsActions.endRoom(false, "reason") && hmsActions.leave();
  }}
>
    End
  </button>}
- To leave a room, ending the session, video display, and screen share options, add the following:
{isLocalScreenShared ? "Unshare" : "Share"}
  <button
    className="text-xs uppercase tracking-wider bg-white py-1 px-2 rounded-lg shadow-lg text-indigo-500 mr-2"
    onClick={toggleScreen}
    active={!isLocalScreenShared}
  >

  </button>

{isLocalVideoEnabled ? "Hide" : "Unhide"}
<button
  className="text-xs uppercase tracking-wider bg-white py-1 px-2 rounded-lg shadow-lg text-indigo-500"
  onClick={toggleVideo}
>
  {/* code here */}
</button>
</> : null
}


  {/* End room button rendering */}

    <button
    className='text-xs uppercase tracking-wider bg-white py-1 px-2 rounded-lg shadow-lg text-iwhite ml-2 bg-red-600'
    // code here
  >
   End
  </button>
     </>
   </div>
-
In the code above, we added video and screen share toggle buttons. Now, let's proceed to add the video and screen tile that will display the video and screen when we click on these buttons.
-
In the Video Folder, there are two files, the VideoTile.js and Screen.js. Both files are almost the same except that they share a different part of the classroom. While VideoTile.js shares the video, Screen.js shares the screen.
VideoTile.js
import React from "react";
import {
    useHMSActions,
    useHMSStore,
    selectLocalPeer,
    selectCameraStreamByPeerID
  } from "@100mslive/hms-video-react";


const VideoTile = ({peer, isLocal }) => {

    const hmsActions = useHMSActions();
    const videoRef = React.useRef(null);
    const videoTrack = useHMSStore(selectCameraStreamByPeerID(peer.id));
    const localPeer = useHMSStore(selectLocalPeer);
    const isModerator = localPeer.roleName === "stage";


    React.useEffect(() => {
        (async () => {
          console.log(videoRef.current);
          console.log(videoTrack);
          if (videoRef.current && videoTrack) {
            if (videoTrack.enabled) {
              await hmsActions.attachVideo(videoTrack.id, videoRef.current);
            } else {
              await hmsActions.detachVideo(videoTrack.id, videoRef.current);
            }
          }
        })();
      }, [hmsActions, videoTrack]);
Screen.js
import React from "react";
import {
    useHMSActions,
    useHMSStore,
    selectScreenShareByPeerID
  } from "@100mslive/hms-video-react";


const Screen = ({peer, isLocal }) => {

    const hmsActions = useHMSActions();
    const screenRef = React.useRef(null);
    const screenTrack = useHMSStore(selectScreenShareByPeerID(peer.id));

    React.useEffect(() => {
        (async () => {
          console.log(screenRef.current);
          console.log(screenTrack);
          if (screenRef.current && screenTrack) {
            if (screenTrack.enabled) {
              await hmsActions.attachVideo(screenTrack.id, screenRef.current);
            } else {
              await hmsActions.detachVideo(screenTrack.id, screenRef.current);
            }
          }
        })();
      }, [hmsActions, screenTrack]);
    // Screen function
- Finally, Room.js should look like this:
import React from "react";
import Screen from "../Video/Screen";
import VideoTile from "../Video/VideoTile";
import ControlBar from "../Control/ControlBar";
import ChatContainer from '../Chat/ChatContainer';
import Footer from "../Control/Footer";
import Header from "../Control/Header";
import {
  useHMSStore,
  selectLocalPeer,
  selectPeers
} from "@100mslive/hms-video-react";

const Room = () => {
  const localPeer = useHMSStore(selectLocalPeer);
  const isModerator = localPeer.roleName === "class";
  const peers = useHMSStore(selectPeers);


   return (
    <div className="flex flex-row">
      <Header />
          <div className="flex flex-wrap">
              {
              isModerator ?
                  (localPeer && < VideoTile peer={localPeer} isLocal={true}  /> )
                :
                (peers &&
                  peers
                    .filter((peer) => !peer.isLocal)
                    .map((peer) => {
                      return (
                        <>
                          <VideoTile isLocal={false} peer={peer} />
                        </>
                      );
                    }))
              }

      </div>

      <div className="bg-gray-900 m-0 h-screen z10 self-center flex-wrap absolute top-0 left-0" style={{ width: 'calc(90vw - 100px)' }}>
      {
              isModerator ?
                  null
                :
                (peers &&
                  peers
                    .filter((peer) => !peer.isLocal)
                    .map((peer) => {
                      return (
                        <>
                          <Screen isLocal={false} peer={peer}/>
                        </>
                      );
                    }))
              }
      </div>
      <ChatContainer />


      {
        isModerator ? <ControlBar /> : <Footer />
      }


    </div>
  );
};

export default Room;
Here’s what the app should look like in the end:
And that’s it. You have created a basic Google Classroom clone with React and 100ms. Note how quickly we were able to create the app, with minimal coding to define the roles, thus cutting down significantly on time and effort spent.
100ms stands out by providing multiple solutions matching both common and unique use cases, with just a few clicks and hooks. Sign up with 100ms for free 10000 minutes, and use the dashboard to explore use cases such as recording, facetime 1-1, and much more.
You might also be interested in our other guides using React and 100ms SDK:
Engineering
Share
Related articles
See all articles