Home
/ Blog /
Building a Clubhouse Clone with 100ms Javascript SDKBuilding a Clubhouse Clone with 100ms Javascript SDK
October 21, 202220 min read


Share


100ms offers a video conferencing infrastructure that provides web and mobile — native iOS and Android SDK, to add live video & audio conferencing to your applications.
100ms is built by the same team that built live infrastructure at Disney and Facebook, so be sure that you are in safe hands.
In this article, we will demonstrate the power of the 100ms SDK by building a Clubhouse clone.
Interested in video conferencing too? checkout how to build one using VueJs and Golang
Clubhouse is a revolutionary audio-based social media network that features chat rooms where users connect, listen, and learn from each other.
Let’s get started with creating our Clubhouse clone in the next section.
We also have step-by-step guides to build Clubhouse like app with different technologies
- Clubhouse clone with Svelte & 100ms
- Clubhouse clone with 100ms iOS SDK
- Clubhouse clone with 100ms Flutter SDK
- Clubhouse clone with 100ms React SDK
Getting Started
Our Clubhouse clone will be built with Parcel, 100ms JavaScript SDK, Tailwind CSS.
To get started, clone this repository to get the starter files.
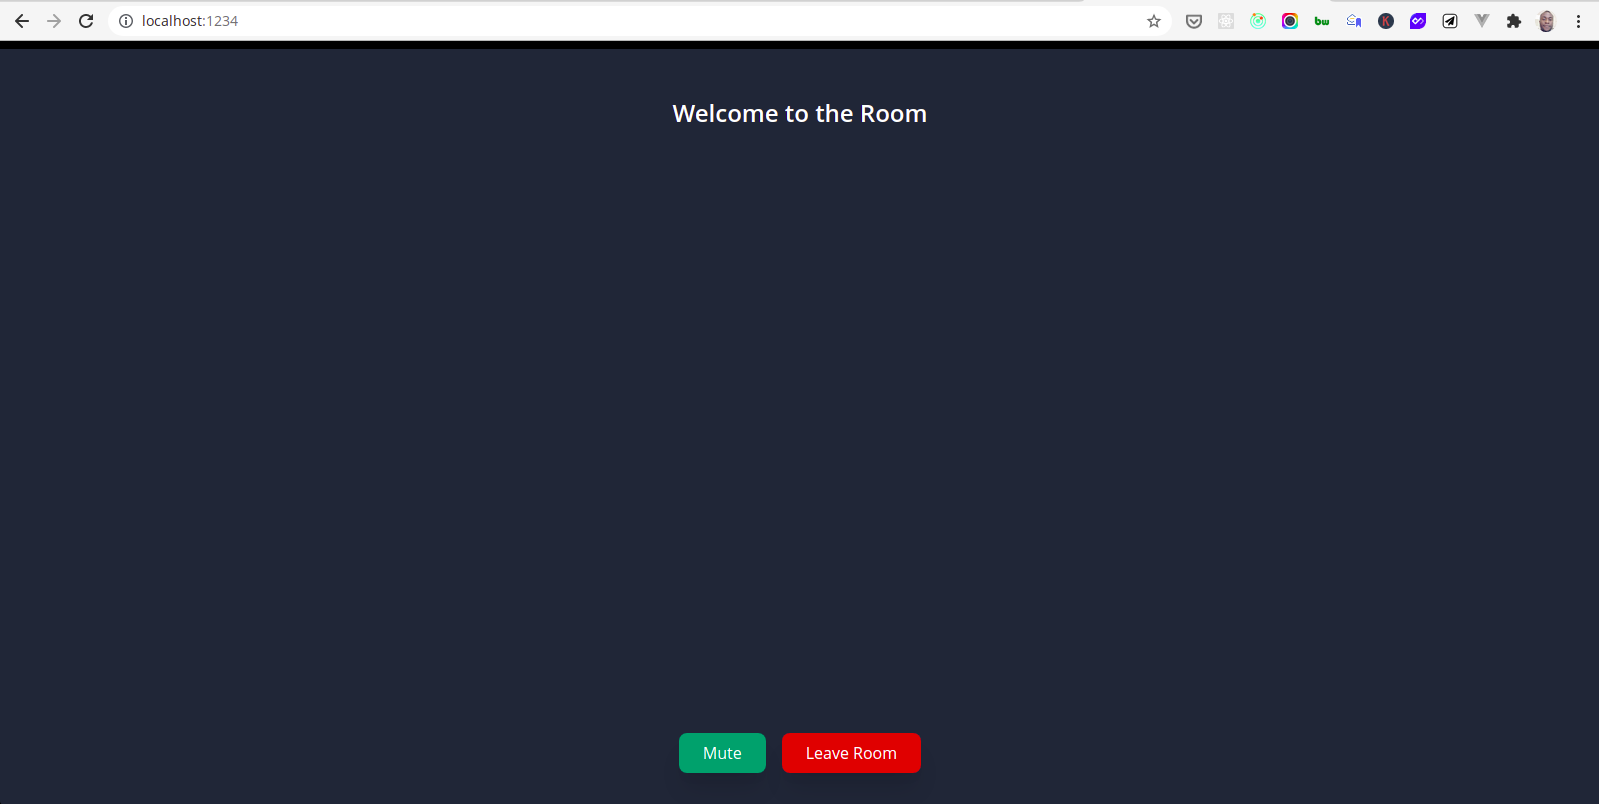
Now you can run npm install to install all dependencies and npm start to start the dev server. After this we get:
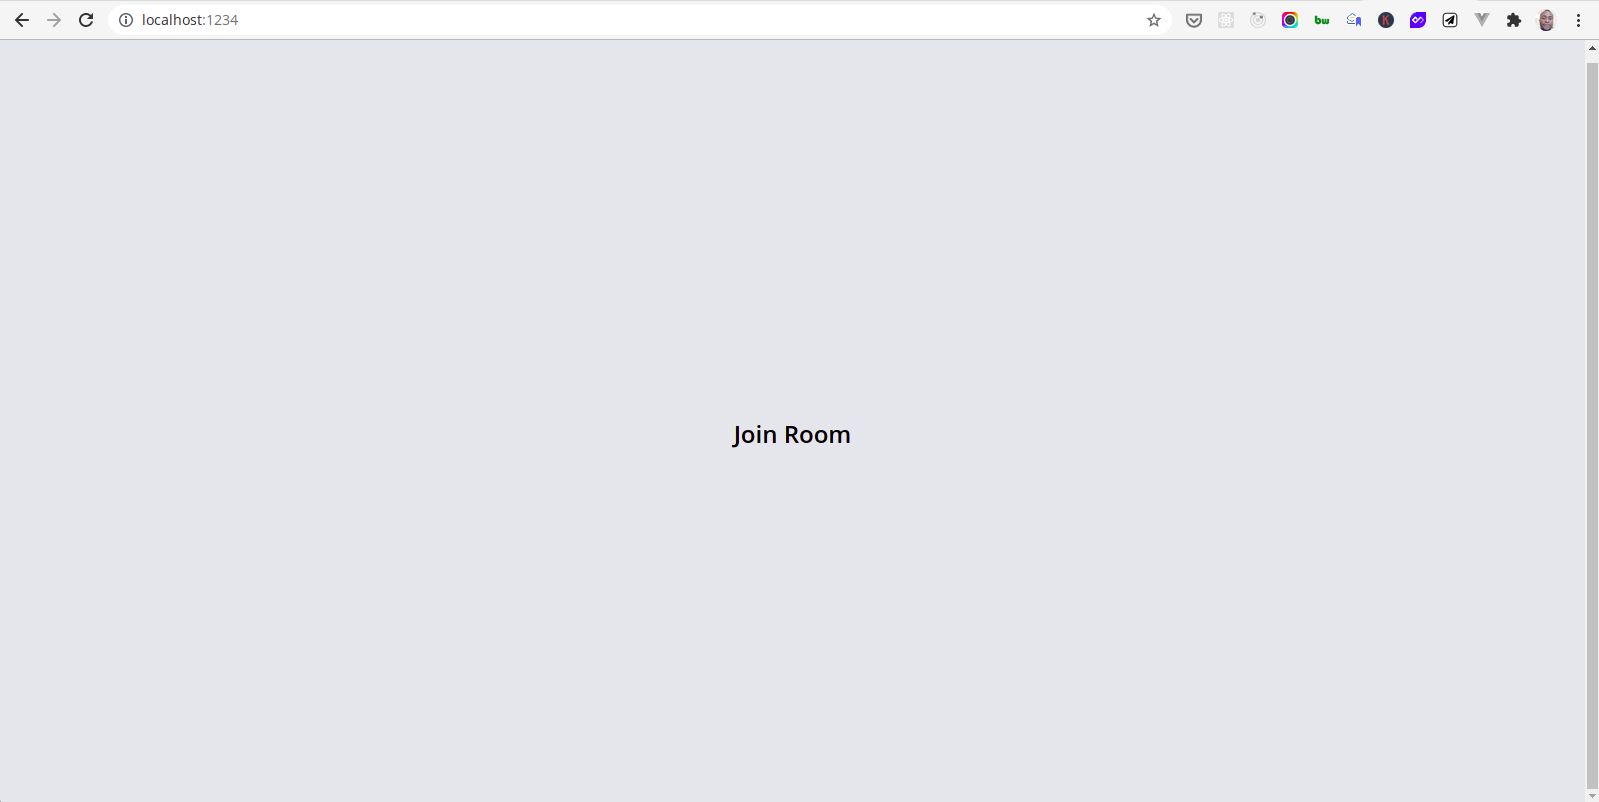
Note: the room section is not displayed because we added a hidden class in the boilerplate above — in the element with room-section id. We only want to display this view when the user joins a room — at that time we would hide the join form.
In the next subsection, we will set up our 100ms credentials. Let’s jump in.
-> Check out 100ms Javascript Docs - HERE
Setting up 100ms credentials
To use the 100ms SDK in our app, we need a room_code.
Since Parcel supports environment variables, create a .env file in your app’s root directory and add the following code:
LISTENER_ROOM_CODE=
MODERATOR_ROOM_CODE=
SPEAKER_ROOM_CODE=
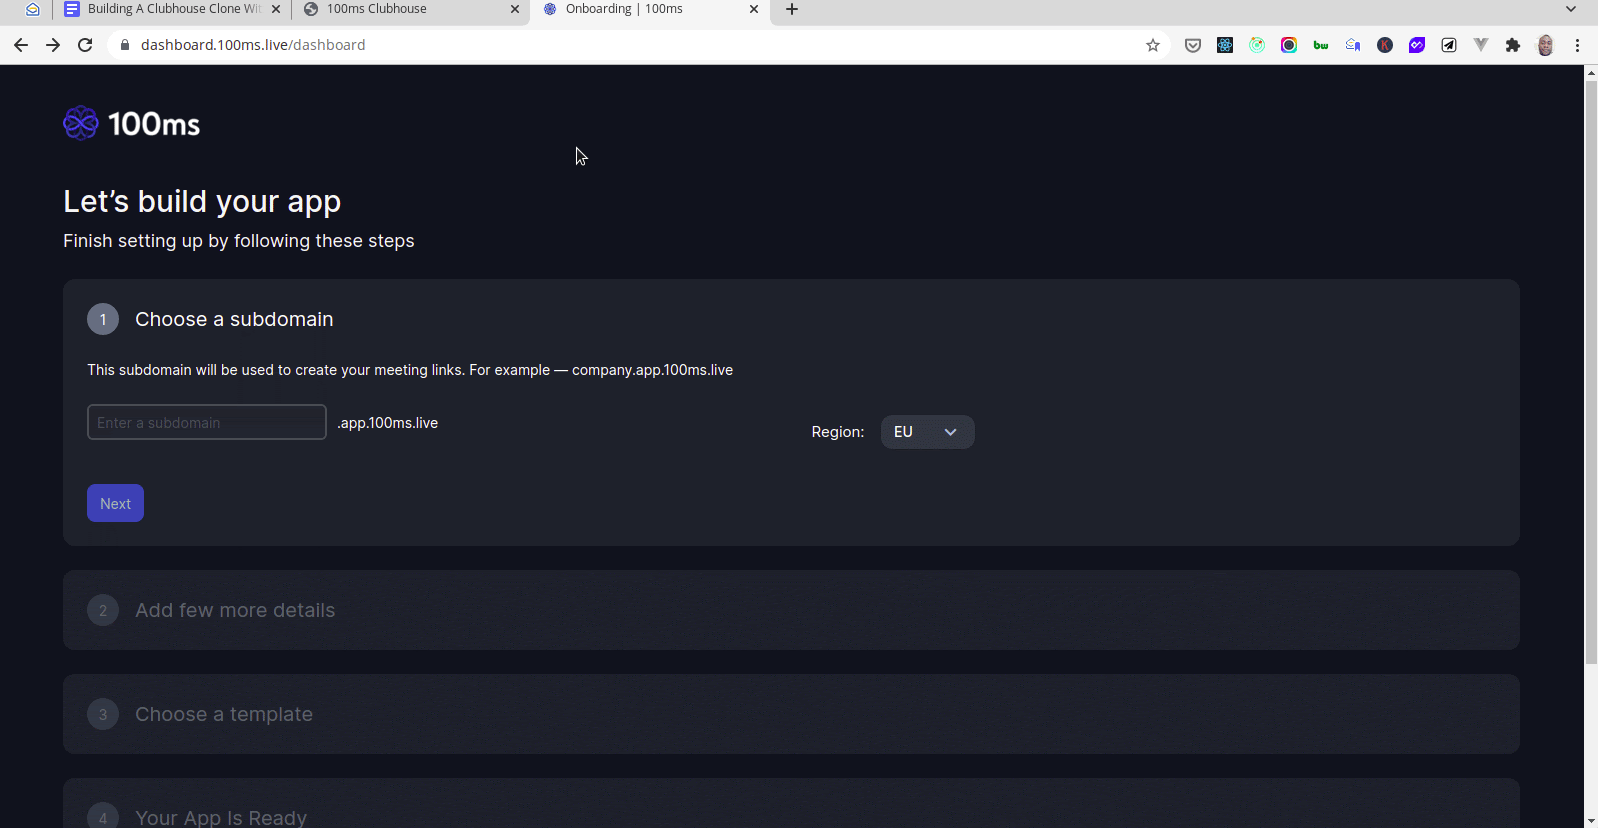
To get our room_code, register and log in to your 100ms dashboard, create Audio Room and in Join Room modal, you will get the room codes for each role.
Create custom app
After registration, you would redirect to your dashboard to create an app.
Add a unique subdomain, and from the template, options choose the “Create your Own” option to create a custom template as seen below:
Create Roles
A role defines who a peer can see/hear, their permissions to mute/unmute someone, change someone's role, etc. Note a peer simply refers to a participant in the room — someone who has joined the room.
Our clubhouse clone would have the following roles:
- Listener — can only listen to others. To create this role, turn off all publish strategies and click save.
- Speaker — can listen and speak. Can mute and unmute himself. To create this role, turn off all publish strategies and leave only can share audio on.
- Moderator — can do everything a speaker can do. Also, can mute/unmute others and change their role. To create this role, turn on only can share audio as in speaker. And modify its permission by turning on can change any participant's role and can mute any participant. Now click on “Setup App”, and we have:

Now we can create our room.
Create Room
When users join a conference call, they are said to join a room. And these users are referred to as peers.
To create a room, click on Rooms from the dashboard then Create Room as seen in the image below:
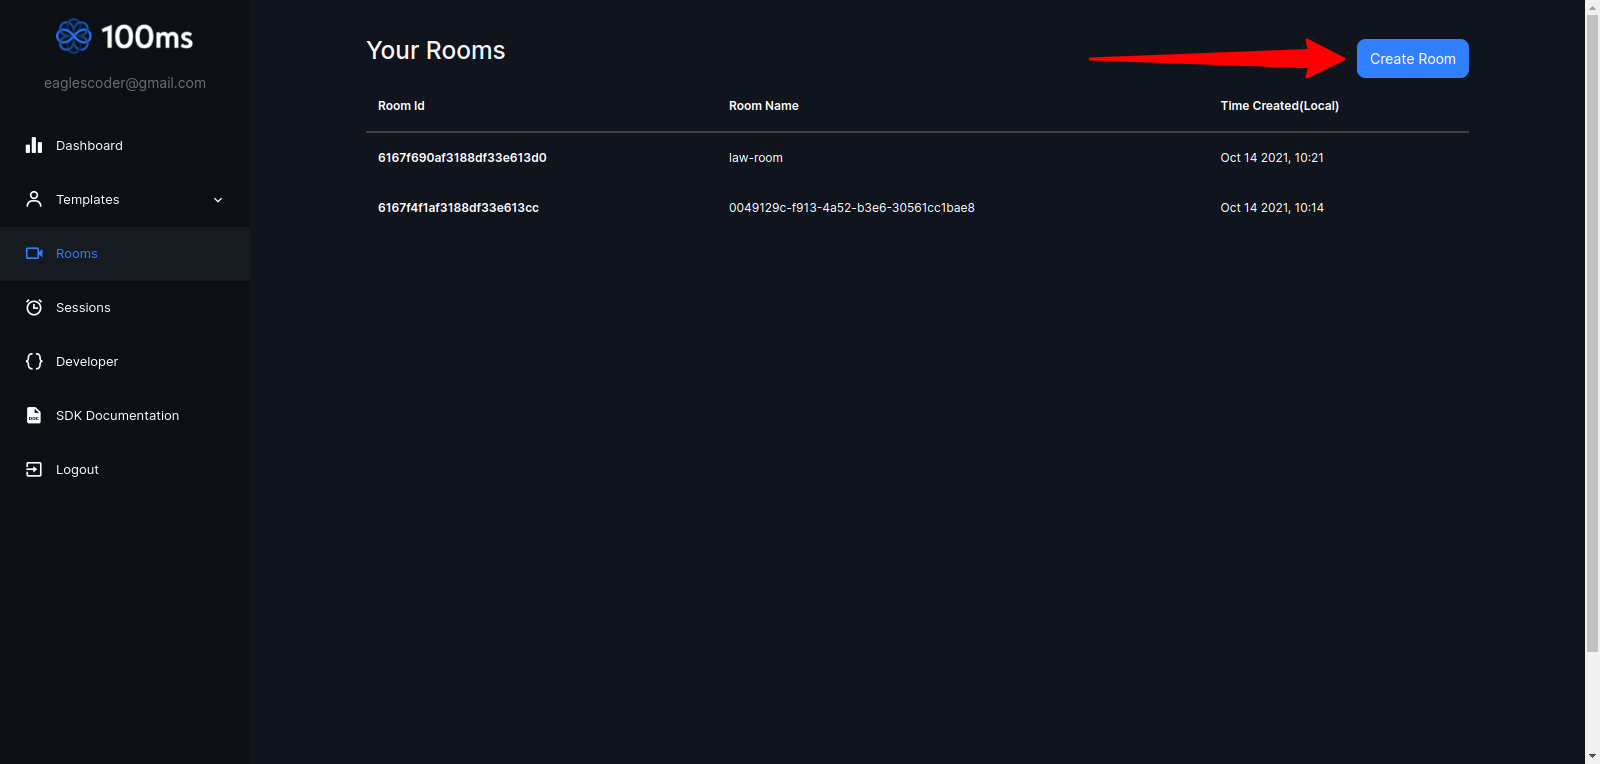
Now fill out the room details and click “Create Room” and you will be redirected to the room details page. From there, copy your room_id and update the .env file accordingly.
Now that we have finished setting up our 100ms app, we can start building our application.
Building the App
To use the 100ms JavaScript SDK we installed previously, there are three entities we need to be familiar with, from the documentation these hooks are:
hmsStore- this contains the complete state of the room at any given time. This includes, for example, participant details, messages, and track states.hmsActions- this is used to perform any action such as joining, muting, and sending a message.hmsNotifications- this can be used to get notified on peer join/leave and new messages to show toast notifications to the user.
To keep things clean, let’s set up our 100ms JavaScript SDK and grab all the needed DOM elements. Add the following code to your app.js file:
    import {
        HMSReactiveStore,
        selectPeers,
        selectIsConnectedToRoom,
        selectIsLocalAudioEnabled
    } from '@100mslive/hms-video-store';

    const hms = new HMSReactiveStore();
    const hmsStore = hms.getStore();
    const hmsActions = hms.getHMSActions();

    // Get DOM elements
    const Form = document.querySelector('#join-form');
    const FormView = document.querySelector('#join-section');
    const RoomView = document.querySelector('#room-section');
    const PeersContainer = document.querySelector('#peers-container');
    const LeaveRoomBtn = document.querySelector('#leave-room-btn');
    const AudioBtn = document.querySelector('#audio-btn');
    const JoinBtn = document.querySelector('#join-btn');

    // handle submit form

    // handle join room view

    // leave room

    // display room

    //handle mute/unmute peer
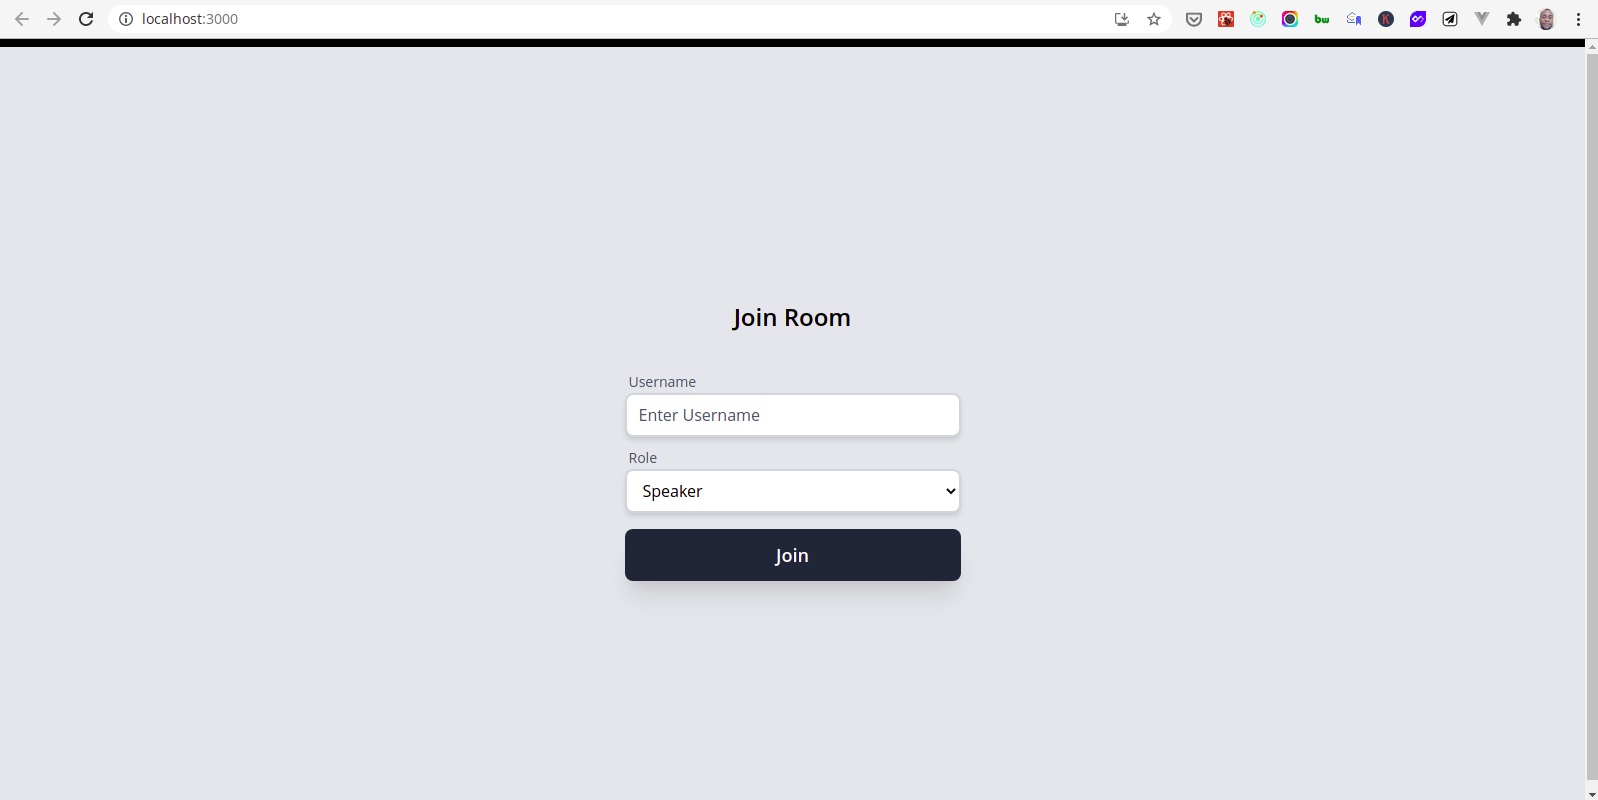
Now we can create the join room view.
Joining Room
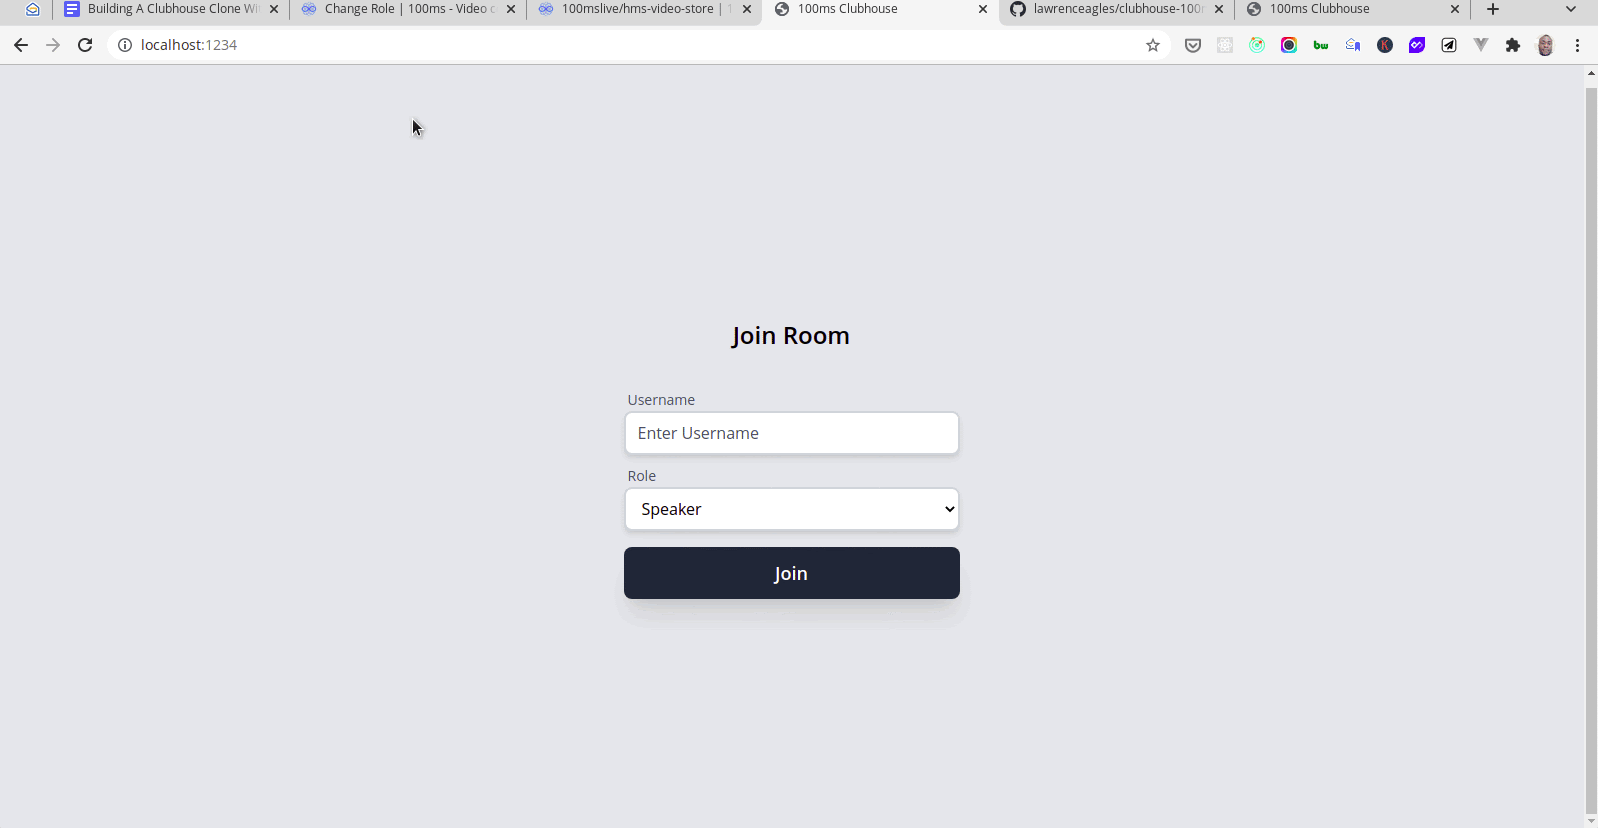
Add the following code to your index.html:
    <form id="join-form" class="mt-8">
        <div class="mx-auto max-w-lg ">
            <div class="py-1">
                <span class="px-1 text-sm text-gray-600">Username</span>
                <input id="username"
                       placeholder="Enter Username"
                       name="username"
                       type="text"
                       class="text-md block px-3 py-2 rounded-lg
                              w-full bg-white border-2 border-gray-300
                              placeholder-gray-600 shadow-md
                              focus:placeholder-gray-500 focus:bg-white
                              focus:border-gray-600 focus:outline-none" />
            </div>

            <div class="py-1">
                <span class="px-1 text-sm text-gray-600">Role</span>
                <select id="roles"
                    class="text-md block px-3 py-2 rounded-lg
                           w-full bg-white border-2 border-gray-300
                           placeholder-gray-600 shadow-md
                           focus:placeholder-gray-500 focus:bg-white
                           focus:border-gray-600 focus:outline-none">
                    <option>Speaker</option>
                    <option>Listener</option>
                    <option>Moderator</option>
                </select>
            </div>
            <button id="join-btn" type="submit"
                class="mt-3 text-lg font-semibold bg-gray-800 w-full
                       text-white rounded-lg px-6 py-3 block shadow-xl
                       hover:text-white hover:bg-black">
                Join
            </button>
        </div>
    </form>
The form above provides an input field for the username and a select option for the roles. We will handle submitting this form by adding the following code to the app.js file:
    Form.addEventListener('submit', async function handleSubmit(e) {
        // prevents form reload
        e.preventDefault();
        // get input fields
        const userName = Form.elements['username'].value; // by name
        const role = Form.elements['roles'].value; // by name
        // simple validation
        if (!userName) return; // makes sure user enters a username
        JoinBtn.innerHTML = 'Loading...';
        try {
            // gets token
            const authToken = await getToken(role);
            // joins rooms
            hmsActions.join({
                userName,
                authToken,
                settings: {
                    isAudioMuted: true
                }
            });
        } catch (error) {
            // handle error
            JoinBtn.innerHTML = 'Join';
            console.log('Token API Error', error);
        }
    });
The code above gets the value of the form fields, gets an authToken by calling the getToken method, and joins the room by calling the join method in hmsActions.
The getToken function is a utility function. We will use two utility functions for the purpose of this tutorial. Let's quickly create them.
In the src folder, create a utils folder and with the following files: getToken.js, createElem.js, and index.js.
In the getToken.js add the following code:
    import { v4 as uuidv4 } from 'uuid';
    const TOKEN_ENDPOINT = process.env.TOKEN_ENDPOINT;
    const ROOM_ID = process.env.ROOM_ID;

    const getToken = async (user_role) => {
        const role = user_role.toLowerCase();
        const user_id = uuidv4();
        const room_id = ROOM_ID;
        const response = await fetch(`${TOKEN_ENDPOINT}api/token`, {
            method: 'POST',
            body: JSON.stringify({
                user_id,
                role,
                room_id
            })
        });
        const { token } = await response.json();
        return token;
    };
    export default getToken;
And in the createElem.js add the following code:
    const createElem = () => {}
    export default createElem
We will update this when we are working on rendering peers to the view. But for now, let’s leave it as a noop.
Next, in the index.js file add the following code to export the above utility functions:
    import createElem from './createElem';
    import getToken from './getToken';

    export { createElem, getToken };
Finally, we will import these functions in our app.js file as seen below:
    import {
        HMSReactiveStore,
        selectPeers,
        selectIsConnectedToRoom,
        selectIsLocalAudioEnabled
    } from '@100mslive/hms-video-store';
    import { getToken, createElem } from '../utils';
    ...
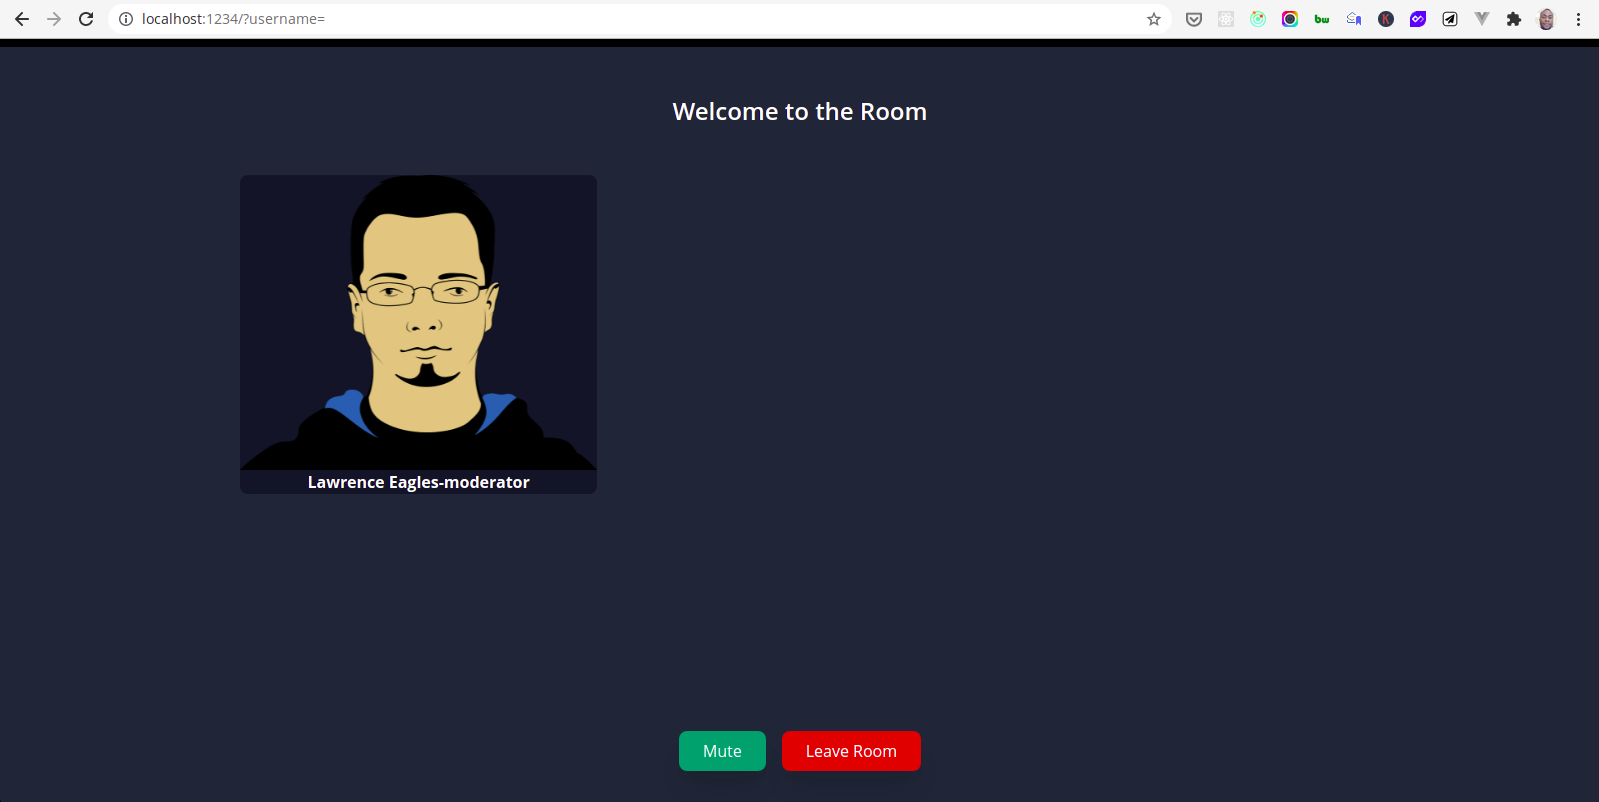
Now when we run our server we get:
When a user joins a room, we want to hide this form and display the room view. And to do this add the following code to your app.js file:
    function handleConnection(isConnected) {
        if (isConnected) {
            console.log('connected');
            // hides Form
            FormView.classList.toggle('hidden');
            // displays room
            RoomView.classList.toggle('hidden');
        } else {
            console.log('disconnected');
            // hides Form
            FormView.classList.toggle('hidden');
            // displays room
            RoomView.classList.toggle('hidden');
        }
    }
    // subscribe to room state
    hmsStore.subscribe(handleConnection, selectIsConnectedToRoom);
In the code above, we subscribed to the room state; consequently, handleConnection is called whenever we join or leave a room. This is possible because hmsStore is reactive and it enables us to register a state. The result of this is that the registered function is called whenever the selected state changes.
To handle leaving a room add the following code to the app.js file:
    function leaveRoom() {
        hmsActions.leave();
        JoinBtn.innerHTML = 'Join';
    }
    LeaveRoomBtn.addEventListener('click', leaveRoom);
    window.onunload = leaveRoom;
The code above, calls the leaveRoom function when the LeaveRoomBtn is clicked to handle leaving a room.
Note: call leave on window.onunload to handle when a user closes or refreshes the tab.
Now we can join a room and we get:
Following this, all that is left is to create our room. Let’s do that in the next subsection.
Create Room
First, update the createElem.js function with the code:
    // helper function to create html elements
    function createElem(tag, attrs = {}, ...children) {
        const newElement = document.createElement(tag);
        Object.keys(attrs).forEach((key) => {
            newElement.setAttribute(key, attrs[key]);
        });

        children.forEach((child) => {
            newElement.append(child);
        });
        return newElement;
    }
    export default createElem;
We will use this helper function to render the peers in a room. To do this, add the following code to the app.js:
    function renderPeers(peers) {
        PeersContainer.innerHTML = ''; // clears the container
        if (!peers) {
            // this allows us to make peer list an optional argument
            peers = hmsStore.getState(selectPeers);
        }
        peers.forEach((peer) => {
            // creates an image tag
            const peerAvatar = createElem('img', {
                class: 'object-center object-cover w-full h-full',
                src: 'https://cdn.pixabay.com/photo/2013/07/13/10/07/man-156584_960_720.png',
                alt: 'photo'
            });

            // create a description paragrah tag with a text
            peerDesc = createElem(
                'p',
                {
                    class: 'text-white font-bold'
                },
                peer.name + '-' + peer.roleName
            );
            const peerContainer = createElem(
                'div',
                {
                    class:
                        'w-full bg-gray-900 rounded-lg sahdow-lg overflow-hidden flex flex-col justify-center items-center'
                },
                peerAvatar,
                peerDesc
            );

            // appends children
            PeersContainer.append(peerContainer);
        });
    }
    hmsStore.subscribe(renderPeers, selectPeers);
In the renderPeers function above, selectPeers gives us an array of peers — remote and your local peer, present in the room.
Next, we create two HTML elements: peerAvatar, and peerDesc by using the createElem helper function. And we appended these elements as children to peerContainer.
Also, since we are subscribed to a peer state, our view gets updated whenever something changes with any of the peers.
Note, in our small contrived example above, we used a random avatar from Pixabay as the src for the peerAvatar element. In a real situation, this should be the link to the user profile photo.
Finally, we will handle mute/unmute by adding the following code to app.js file:
    AudioBtn.addEventListener('click', () => {
        let audioEnabled = !hmsStore.getState(selectIsLocalAudioEnabled);
        AudioBtn.innerText = audioEnabled ? 'Mute' : 'Unmute';
        AudioBtn.classList.toggle('bg-green-600');
        AudioBtn.classList.toggle('bg-red-600');
        hmsActions.setLocalAudioEnabled(audioEnabled);
    });
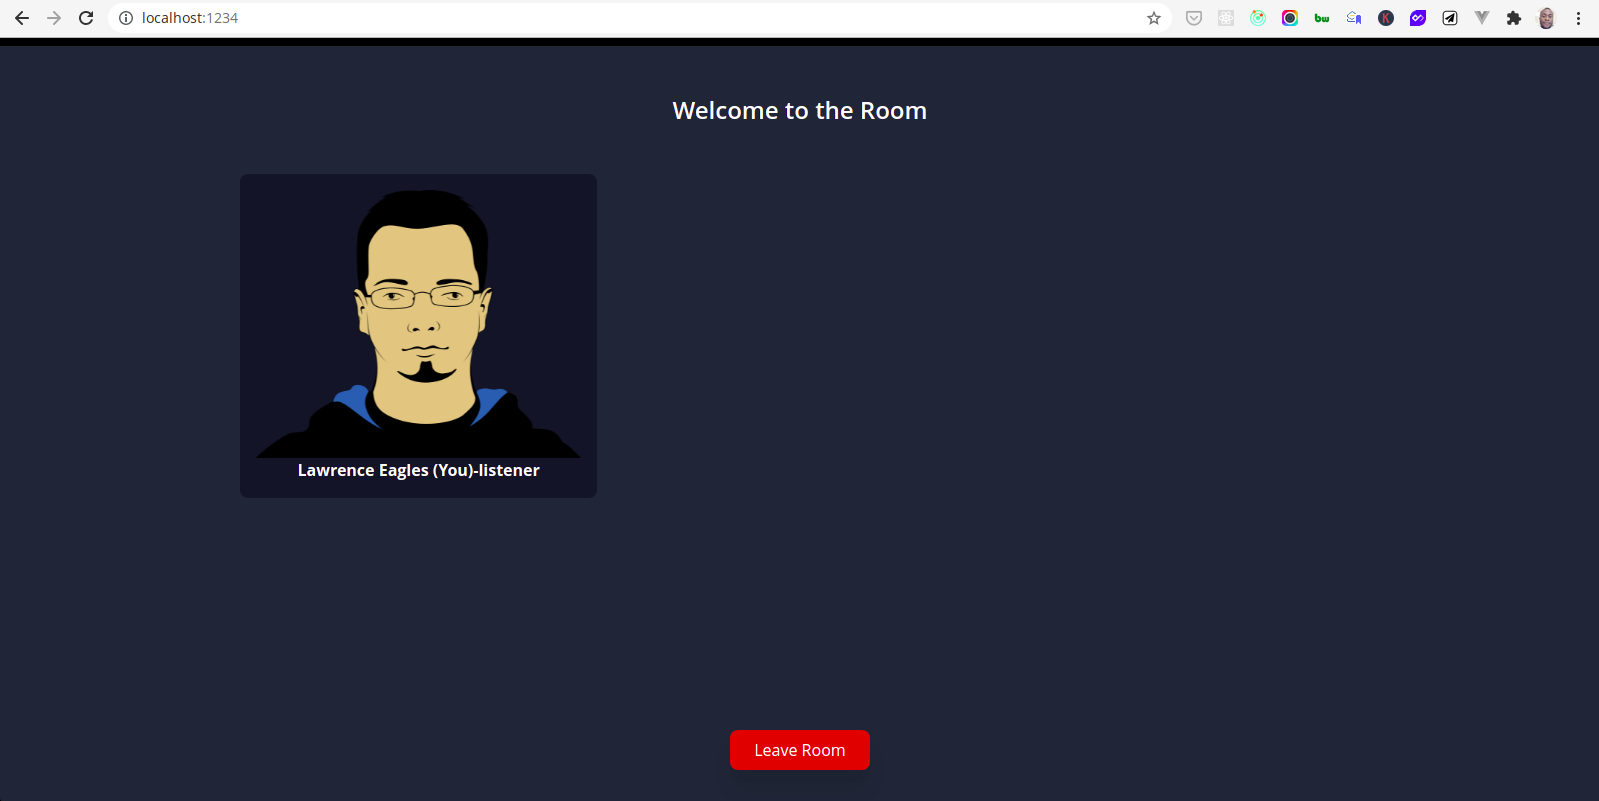
Now we can test our app by running npm start, filling out, and submitting the form. And after joining a room we get:
You can mute/unmute yourself, and leave the room.
Role change
Our current setup does not support the “change role” feature, but in this section, we will add this feature.
Currently, a listener can mute/unmute but it is best we hide this feature since the listener does not have publish permissions.
So we need to upgrade our mute/unmute feature to work with roles. We will get the permissions of the local peer from the selectLocalPeerRole variable but first, import it by updating app.js as seen below:
import {
    HMSReactiveStore,
    selectPeers,
    selectIsConnectedToRoom,
    selectIsLocalAudioEnabled,
    selectLocalPeerRole // imports selectLocalPeerRole
} from '@100mslive/hms-video-store';
...
Now, update the handleConnection function as seen below to hide the mute/unmute button from the listener update:
// handle join room view
function handleConnection(isConnected) {
    // get local peer role.
    const role = hmsStore.getState(selectLocalPeerRole);

    if (isConnected) {
   console.log('connected');

   //hides mute btn for listner
   if (role.name === 'listener') {
   AudioBtn.classList.add('hidden');
   }

   // hides Form
   FormView.classList.toggle('hidden');
   // displays room
   RoomView.classList.toggle('hidden');
    } else {
   console.log('disconnected');
   // hides Form
   FormView.classList.toggle('hidden');
   // displays room
   RoomView.classList.toggle('hidden');
    }
}
Next, we will start working on the role change feature.
Update the renderPeer function’s forEach loop as seen below:
...
    peers.forEach((peer) => {
        // creates an image tag
        const peerAvatar = createElem('img', {
            class: 'object-center object-cover w-full h-full',
            src: 'https://cdn.pixabay.com/photo/2013/07/13/10/07/man-156584_960_720.png',
            alt: 'photo'
        });
        // create a description paragraph tag with a text
        const peerDesc = createElem(
            'p',
            {
                class: 'text-white font-bold'
            },
            `${peer.name}${peer.isLocal ? ' (You)' : ''}-${peer.roleName} `
        );
        // add mute/unmute list items
        const MuteItem = createElem(
            'li',
            { id: 'mute', class: 'cursor-pointer' },
            createElem(
                'span',
                {
                    'data-id': peer.id,
                    'data-islocal': peer.isLocal,
                    class: 'mute rounded-t bg-gray-200 hover:bg-gray-400 py-2 px-4 block'
                },
                'Unmute'
            )
        );
        const SpeakerItem = createElem(
            'li',
            { id: 'speaker', class: 'cursor-pointer' },
            createElem(
                'span',
                {
                    'data-id': peer.id,
                    class: 'speaker bg-gray-200 hover:bg-gray-400 py-2 px-4 block'
                },
                'Make speaker'
            )
        );
        const ListenerItem = createElem(
            'li',
            { id: 'listener', class: 'cursor-pointer' },
            createElem(
                'span',
                {
                    'data-id': peer.id,
                    class: 'listener rounded-b bg-gray-200 hover:bg-gray-400 py-2 px-4 block'
                },
                'Make listener'
            )
        );
        const menu = createElem(
            'button',
            { class: 'text-white font-bold text-3xl z-20 rounded inline-flex items-center' },
            '...'
        );
        const dropdown = createElem(
            'ul',
            { class: 'dropdown-menu absolute top-4 right-0 hidden text-gray-700 w-max pt-1 group-hover:block z-50' },
            MuteItem,
            SpeakerItem,
            ListenerItem
        );
        const menuContainer = createElem(
            'div',
            {
                class: `${peer.isLocal && peer.roleName === 'listener'
                ? 'hidden'
                : ''} dropdown inline-block absolute top-0 right-8`
            },
            menu,
            dropdown
        );
        const peerContainer = createElem(
            'div',
            {
                class:
                    'relative w-full p-4 bg-gray-900 rounded-lg sahdow-lg overflow-hidden flex flex-col justify-center items-center'
            },
            menuContainer,
            peerAvatar,
            peerDesc
        );
        // appends children
        PeersContainer.append(peerContainer);
    });
...
The code above creates the list items needed for the change role feature. And these are nested as children of menuContainer. Also, the menuContainer is dynamically hidden if the local peer is a listener by adding the hidden Tailwind CSS class. And this gives each user with publish permission, ellipses that display a list of actions.
Thus a listener cannot mute/unmute as seen below:
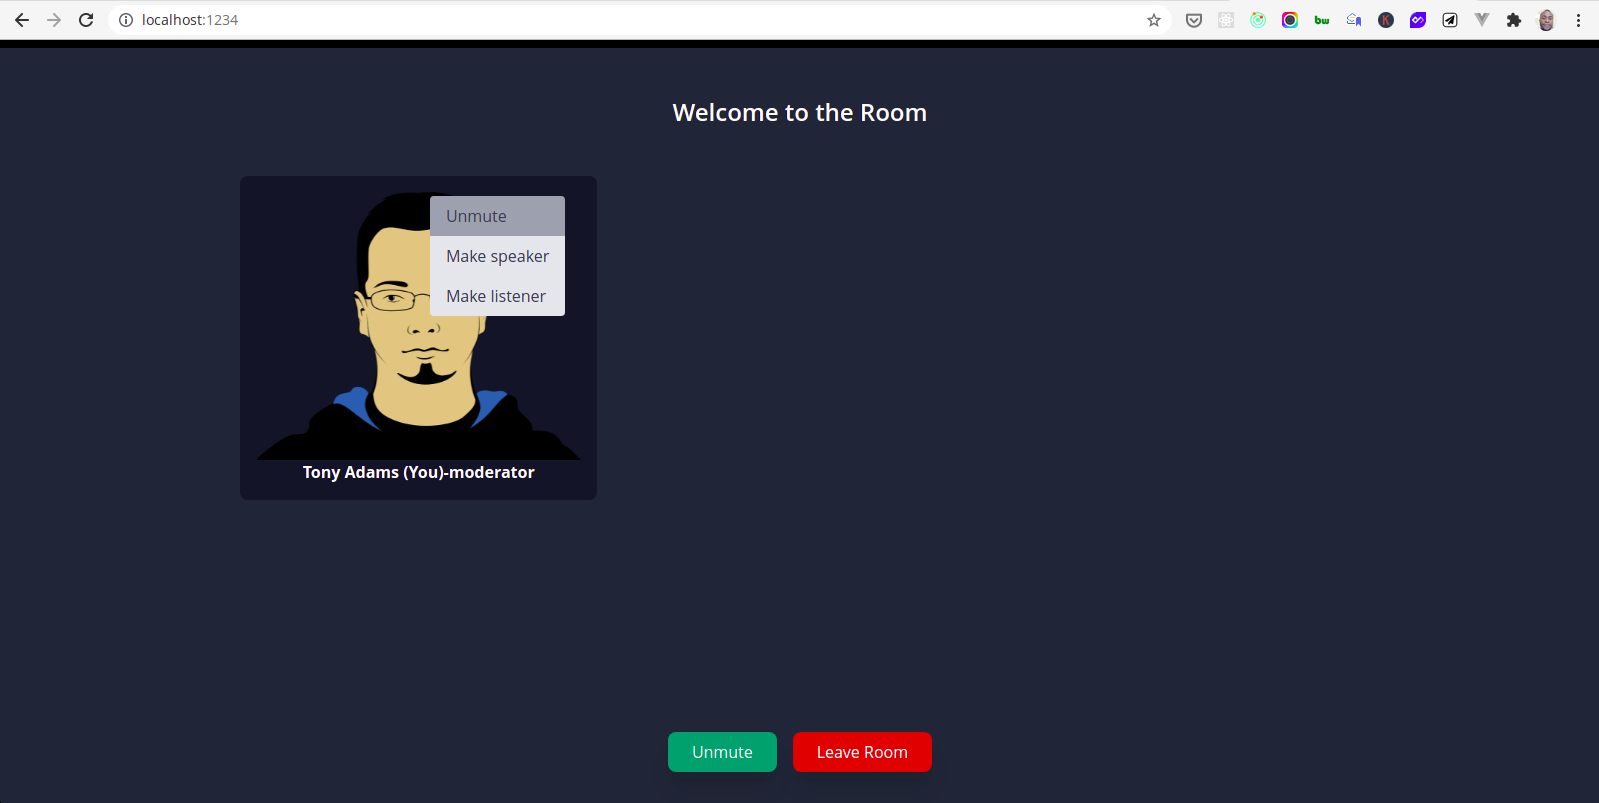
But a moderator can mute/unmute as seen below:
Also, we dynamically passed peer.id and peer.islocal by using the HTML 5 data-* global attributes. This enables us to pass the custom data needed for implementing the change role feature.
We chose this pattern rather than setting up our event handlers within the forEach loop because this is cleaner and easier to understand. Also, setting up event handlers in a loop in JavaScript can easily lead to bugs because it requires us to add an event handler for each list item — DOM nodes and somehow bind this.
We could use event delegation; this pattern enables us to add only one event handler to a parent element which would analyze bubbled events to find a match on child elements.
Add the following code at the button of app.js :
// handle change role and mute/unmuter other peers
document.addEventListener(
    'click',
    function(event) {
        const role = hmsStore.getState(selectLocalPeerRole);
        // hanadle mute/unmute
        if (event.target.matches('.mute')) {
            if (role.name === 'listener') {
                alert('You do not have the permission to mute/unmute!');
                return;
            }
            if (
                role.name === 'speaker' &&
                JSON.parse(event.target.dataset.islocal) === false) {
                alert(
                  'You do not have the permission to mute/unmute other peers!'
                );
                return;
            }
            let audioEnabled = !hmsStore.getState(selectIsLocalAudioEnabled);
            hmsActions.setLocalAudioEnabled(audioEnabled);
            event.target.innerText = audioEnabled ? 'Mute' : 'unmute';
        }

        // handle change role
        if (event.target.matches('.speaker')) {
            if (!role.permissions.changeRole) {
                alert('You do not have the permission to change role!');
                return;
            }
            hmsActions.changeRole(event.target.dataset.id, 'speaker', true);
        }

        if (event.target.matches('.listener')) {
            if (!role.permissions.changeRole) {
                alert('You do not have the permission to change role!');
                return;
            }
            hmsActions.changeRole(event.target.dataset.id, 'listener', true);
        }
    },
    false
);
In the code above we set up one event listener to handle all the mute and change role events.
We get the clicked DOM element with event.target.matches and we get a peer’s permission using role.permissions.
From our implementation a listener cannot perform any action — he/she can only listen. A speaker can mute/unmute only himself and a moderator can mute/unmute himself and other peers. And he can also change the role of his peers.
Now our final app looks like this:
Conclusion
100ms is both powerful and easy to use. With a few clicks from the dashboard, we set up a custom app that we easily integrated into our app using the 100ms SDK.
Interestingly, we have barely scratched the surface of what 100ms can do. Features such as screen share, RTMP streaming and recording, chat, and more can all be implemented by using this awesome infrastructure.
You can join the discord channel to learn more about 100ms or give it a try in your next app for free. Lastly, if you are interested in the source code of the final application, you can get it here.
Engineering
Share
Related articles
See all articles